How to Complete a Signature Request (Signer Guide)
This guide walks you through completing a signature request with Pactly e-Sign (powered by SignWell).
Video Walkthrough
Section titled “Video Walkthrough”Step-by-Step Instructions
Section titled “Step-by-Step Instructions”Step 1: Open the Email Invitation
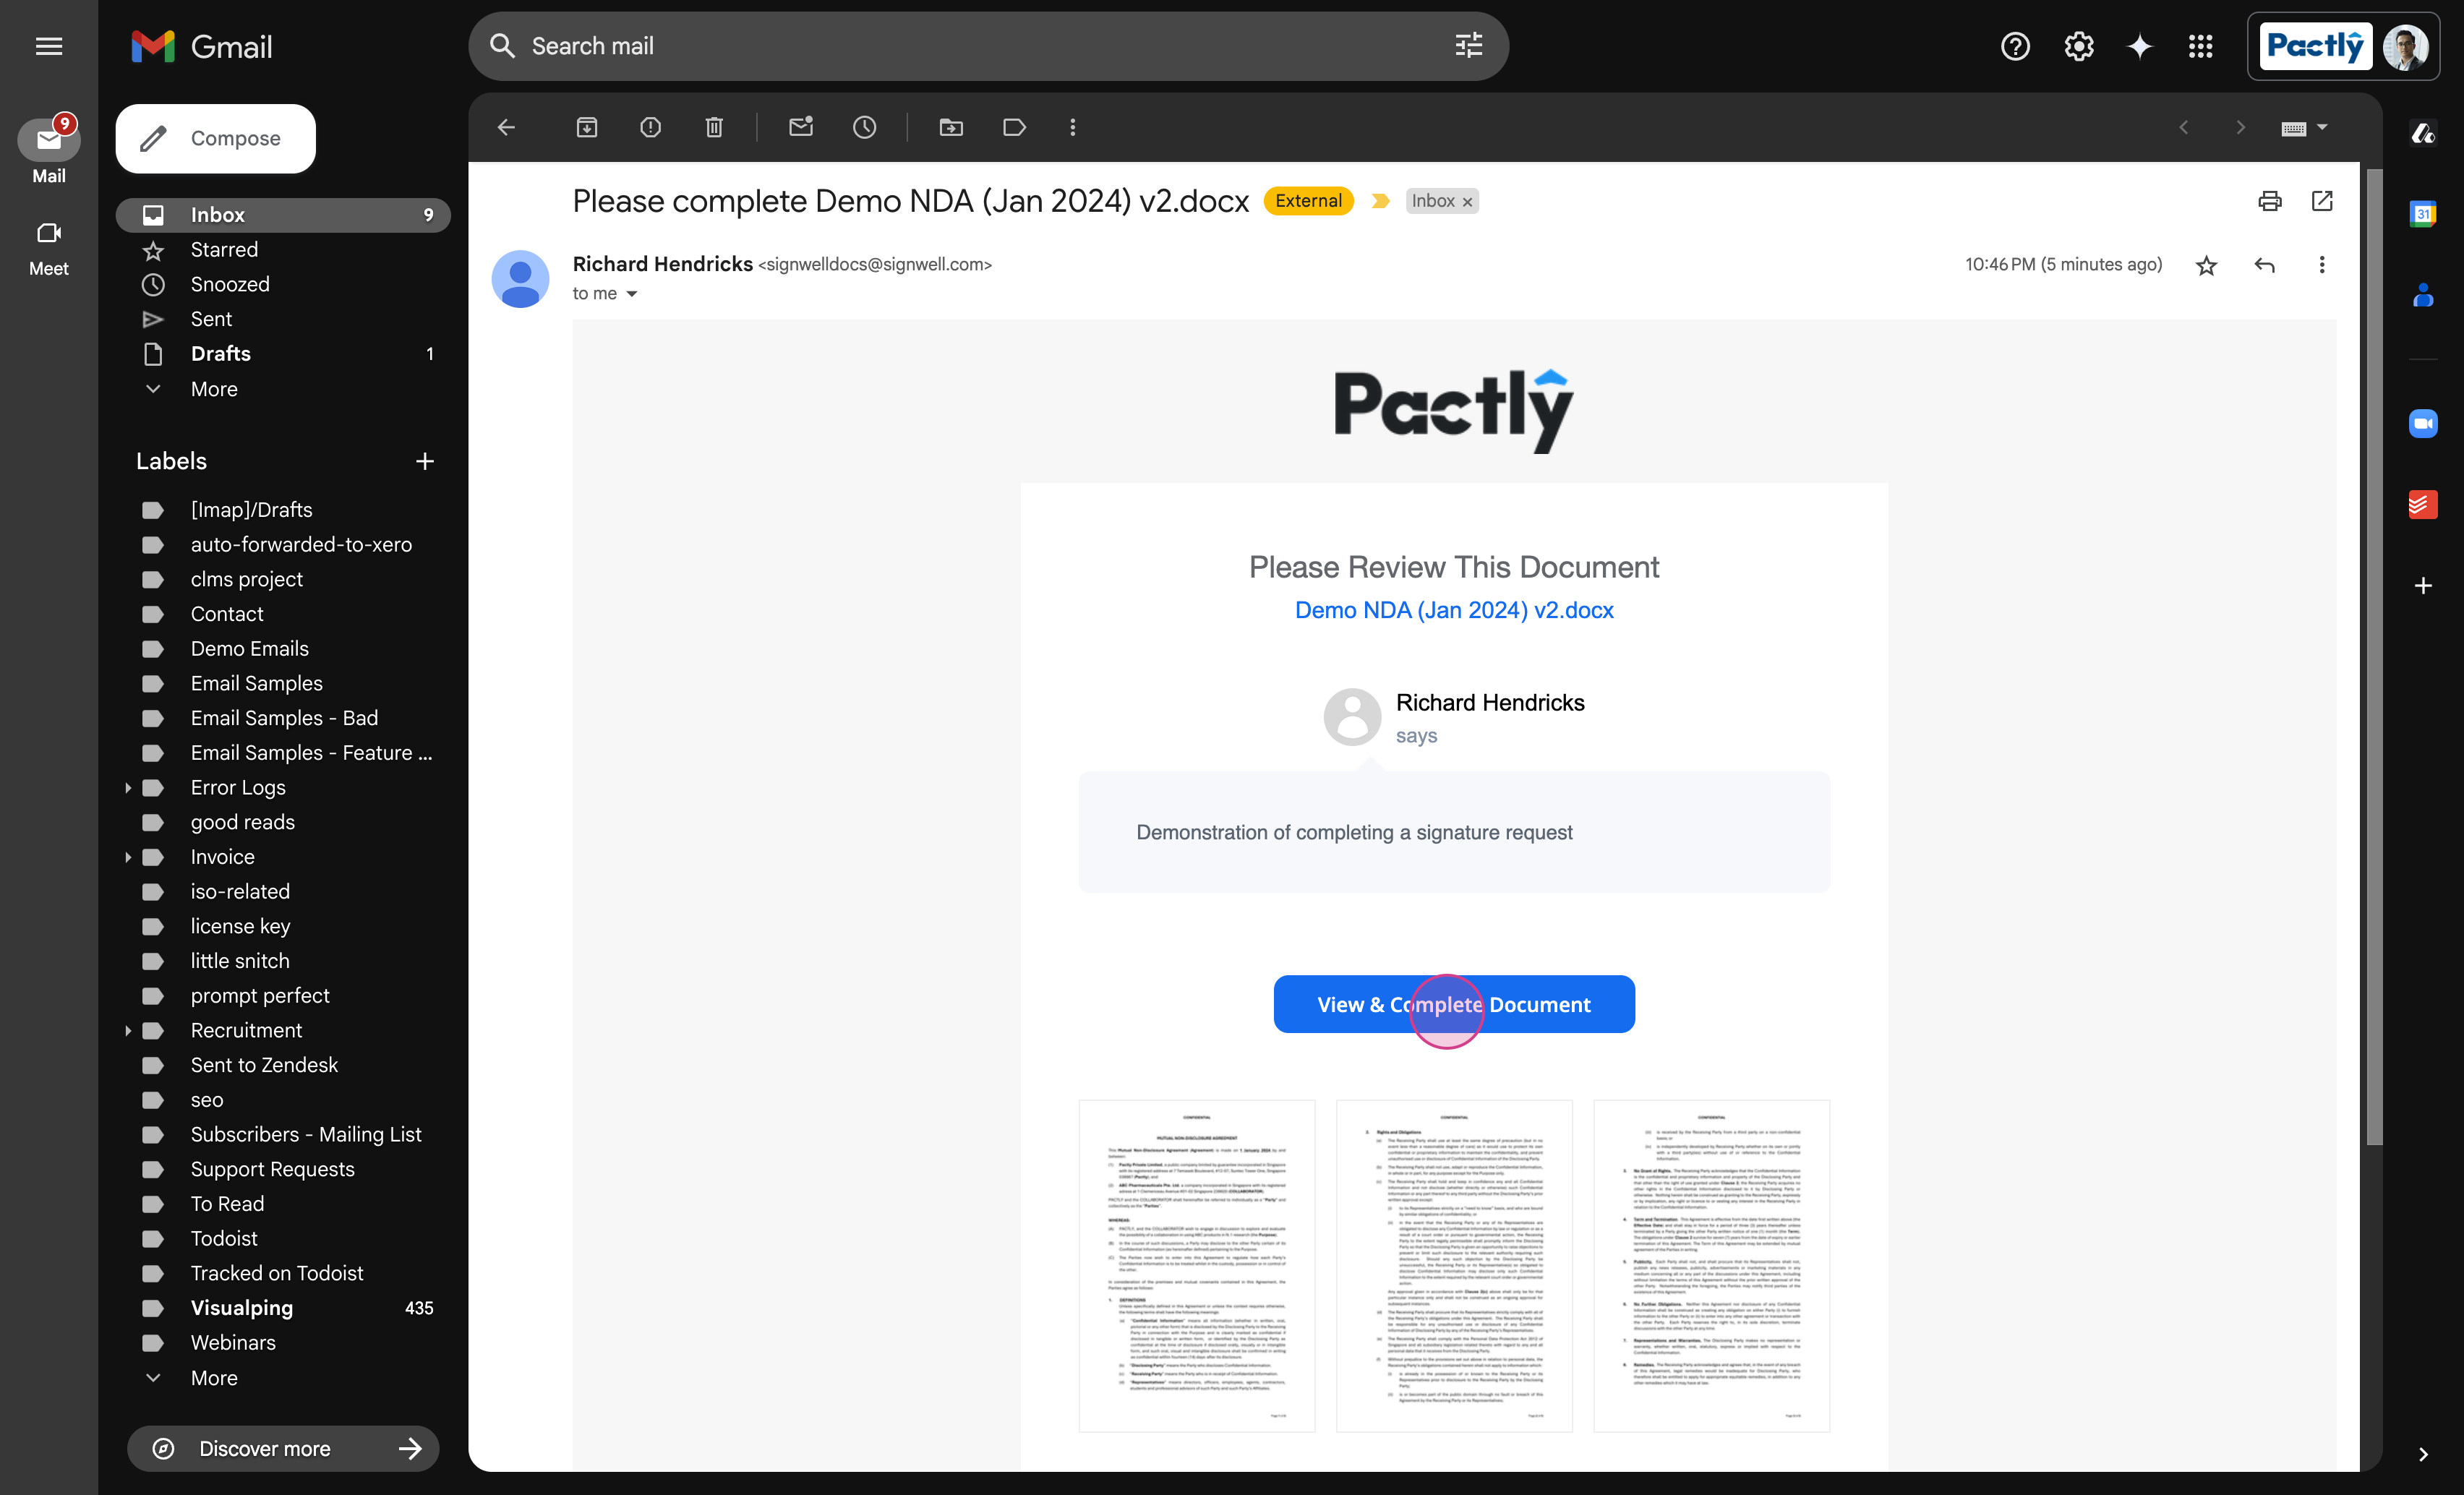
Section titled “Step 1: Open the Email Invitation”Look for an email notifying you of a signature request. It displays the sender’s name and a button to start the process.

Step 2: Begin Signing
Section titled “Step 2: Begin Signing”Click View to open the document.
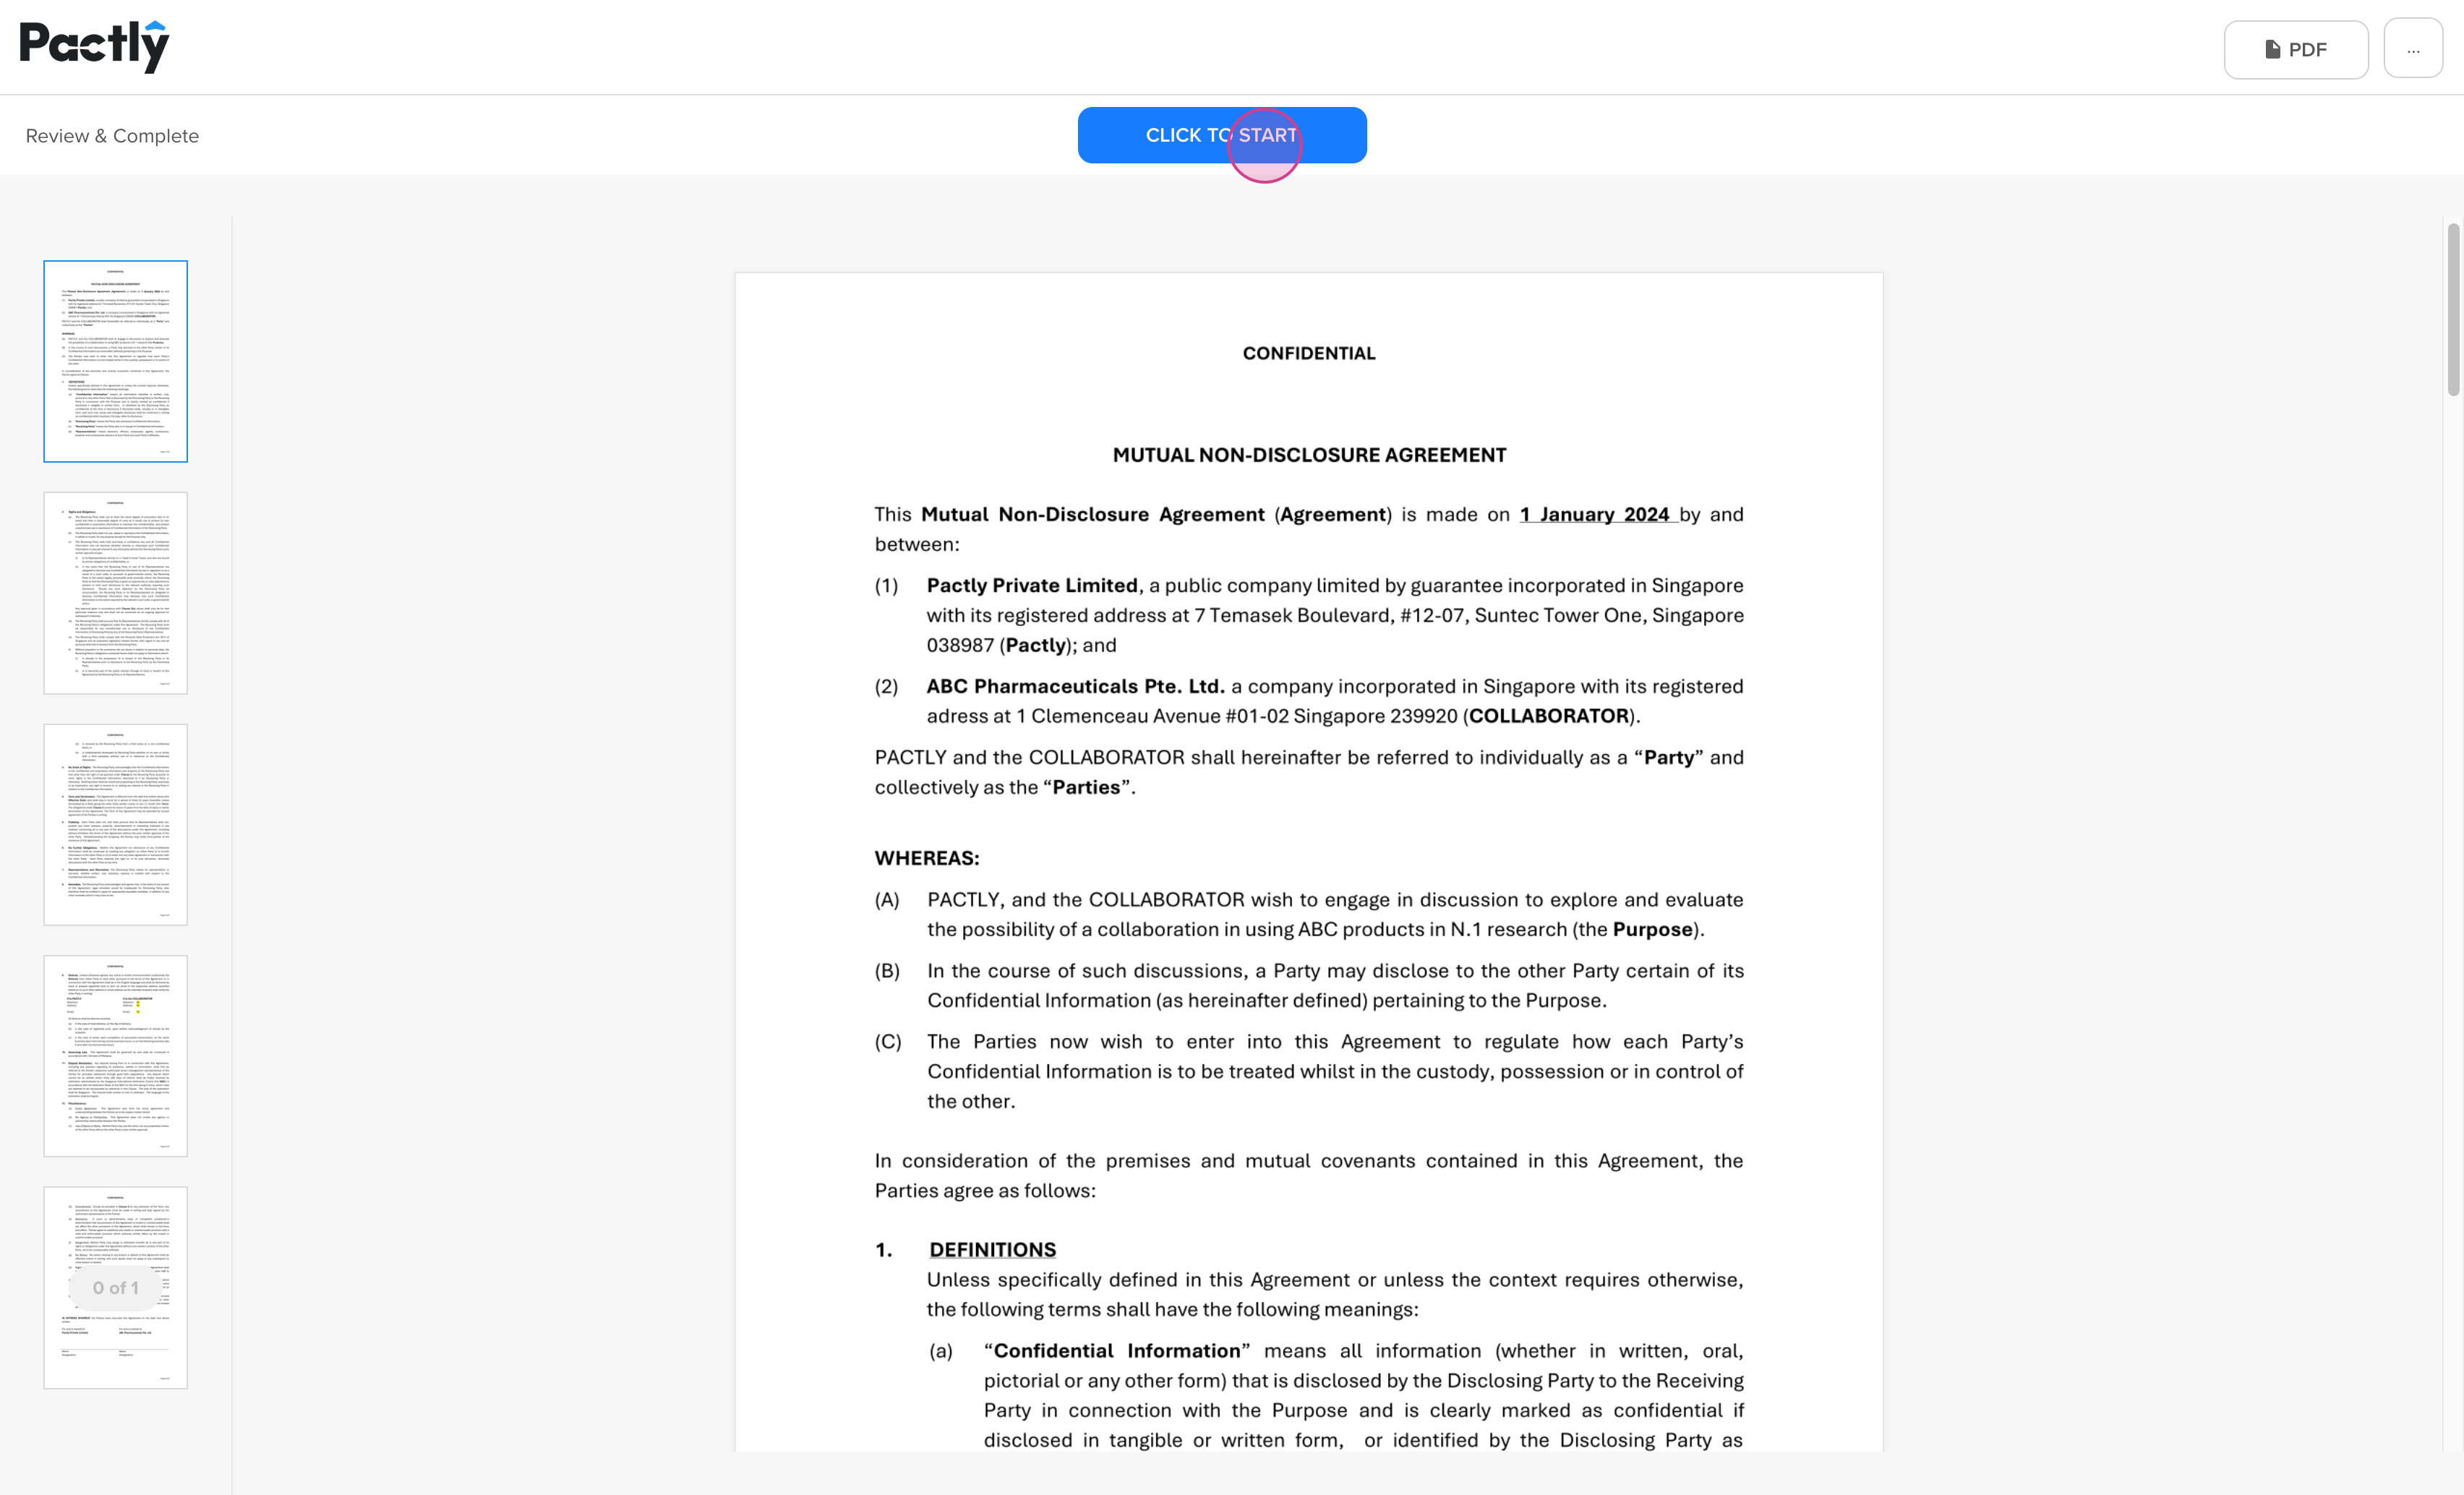
Step 3: Navigate to Signature Fields
Section titled “Step 3: Navigate to Signature Fields”When the document opens, scroll to the signature area or click Start to jump directly to where you need to sign.
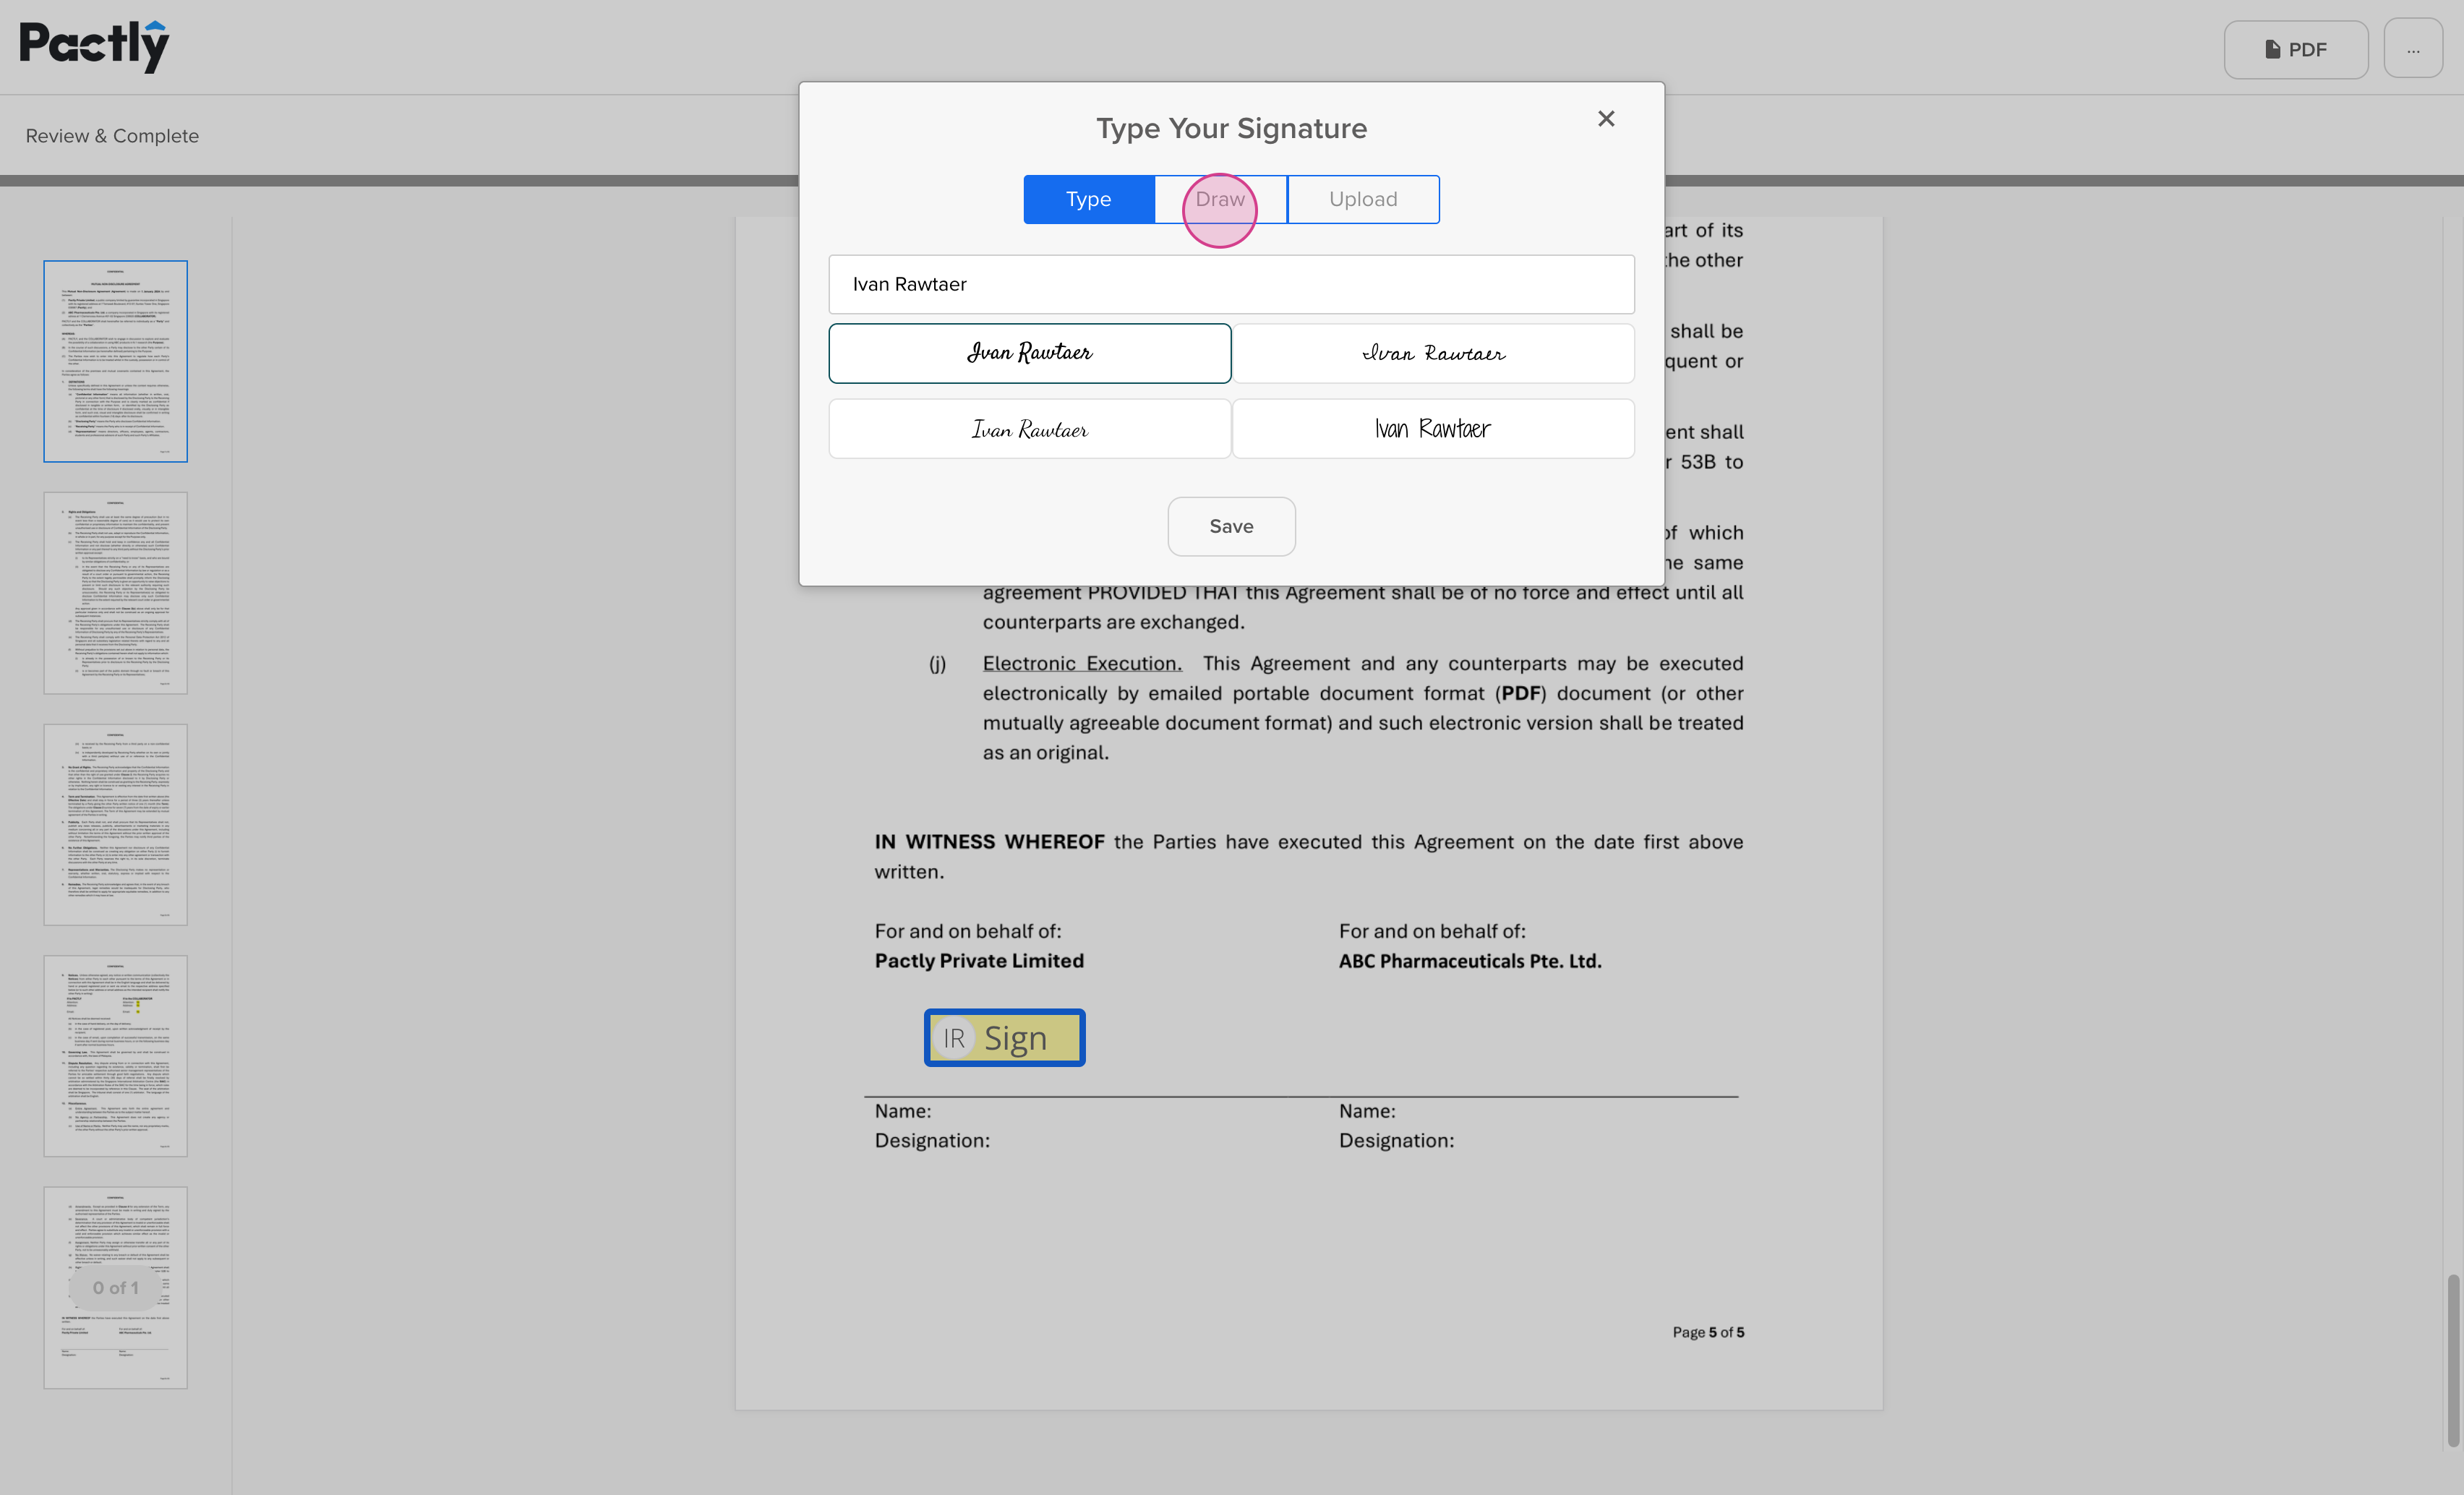
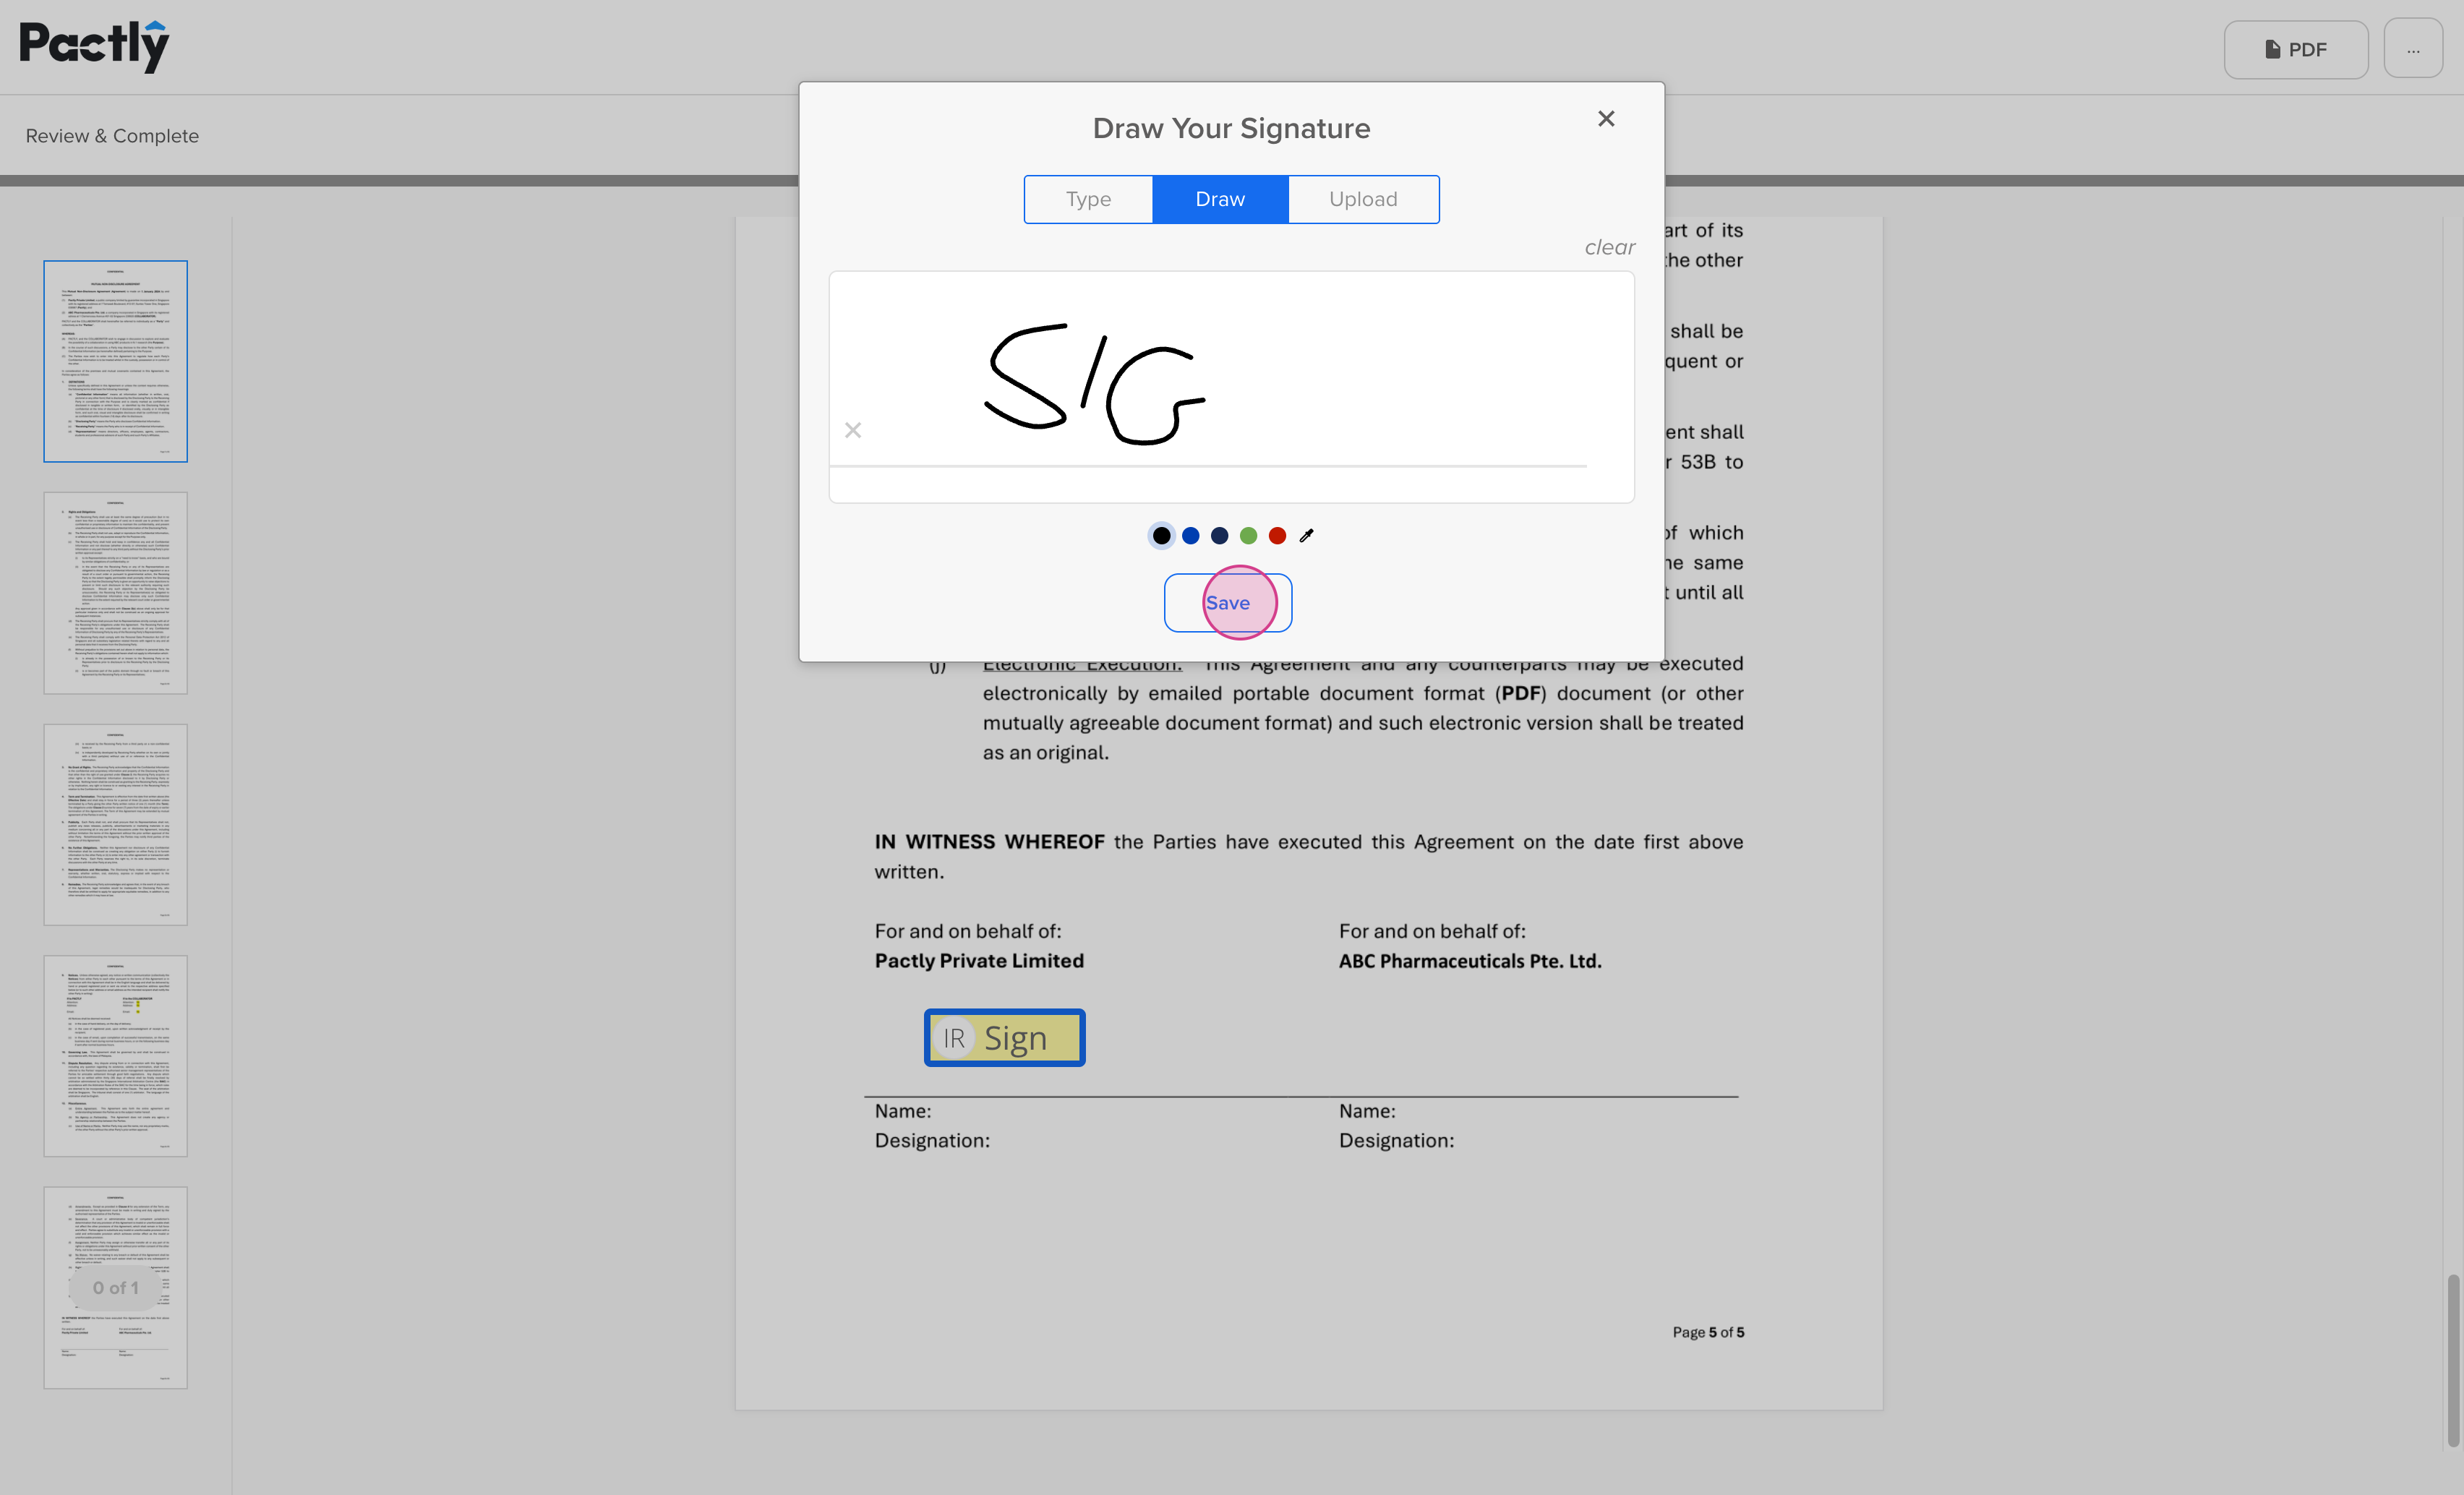
Step 4: Enter Your Signature
Section titled “Step 4: Enter Your Signature”When prompted, choose how you want to provide your signature: type, draw, or upload an image.
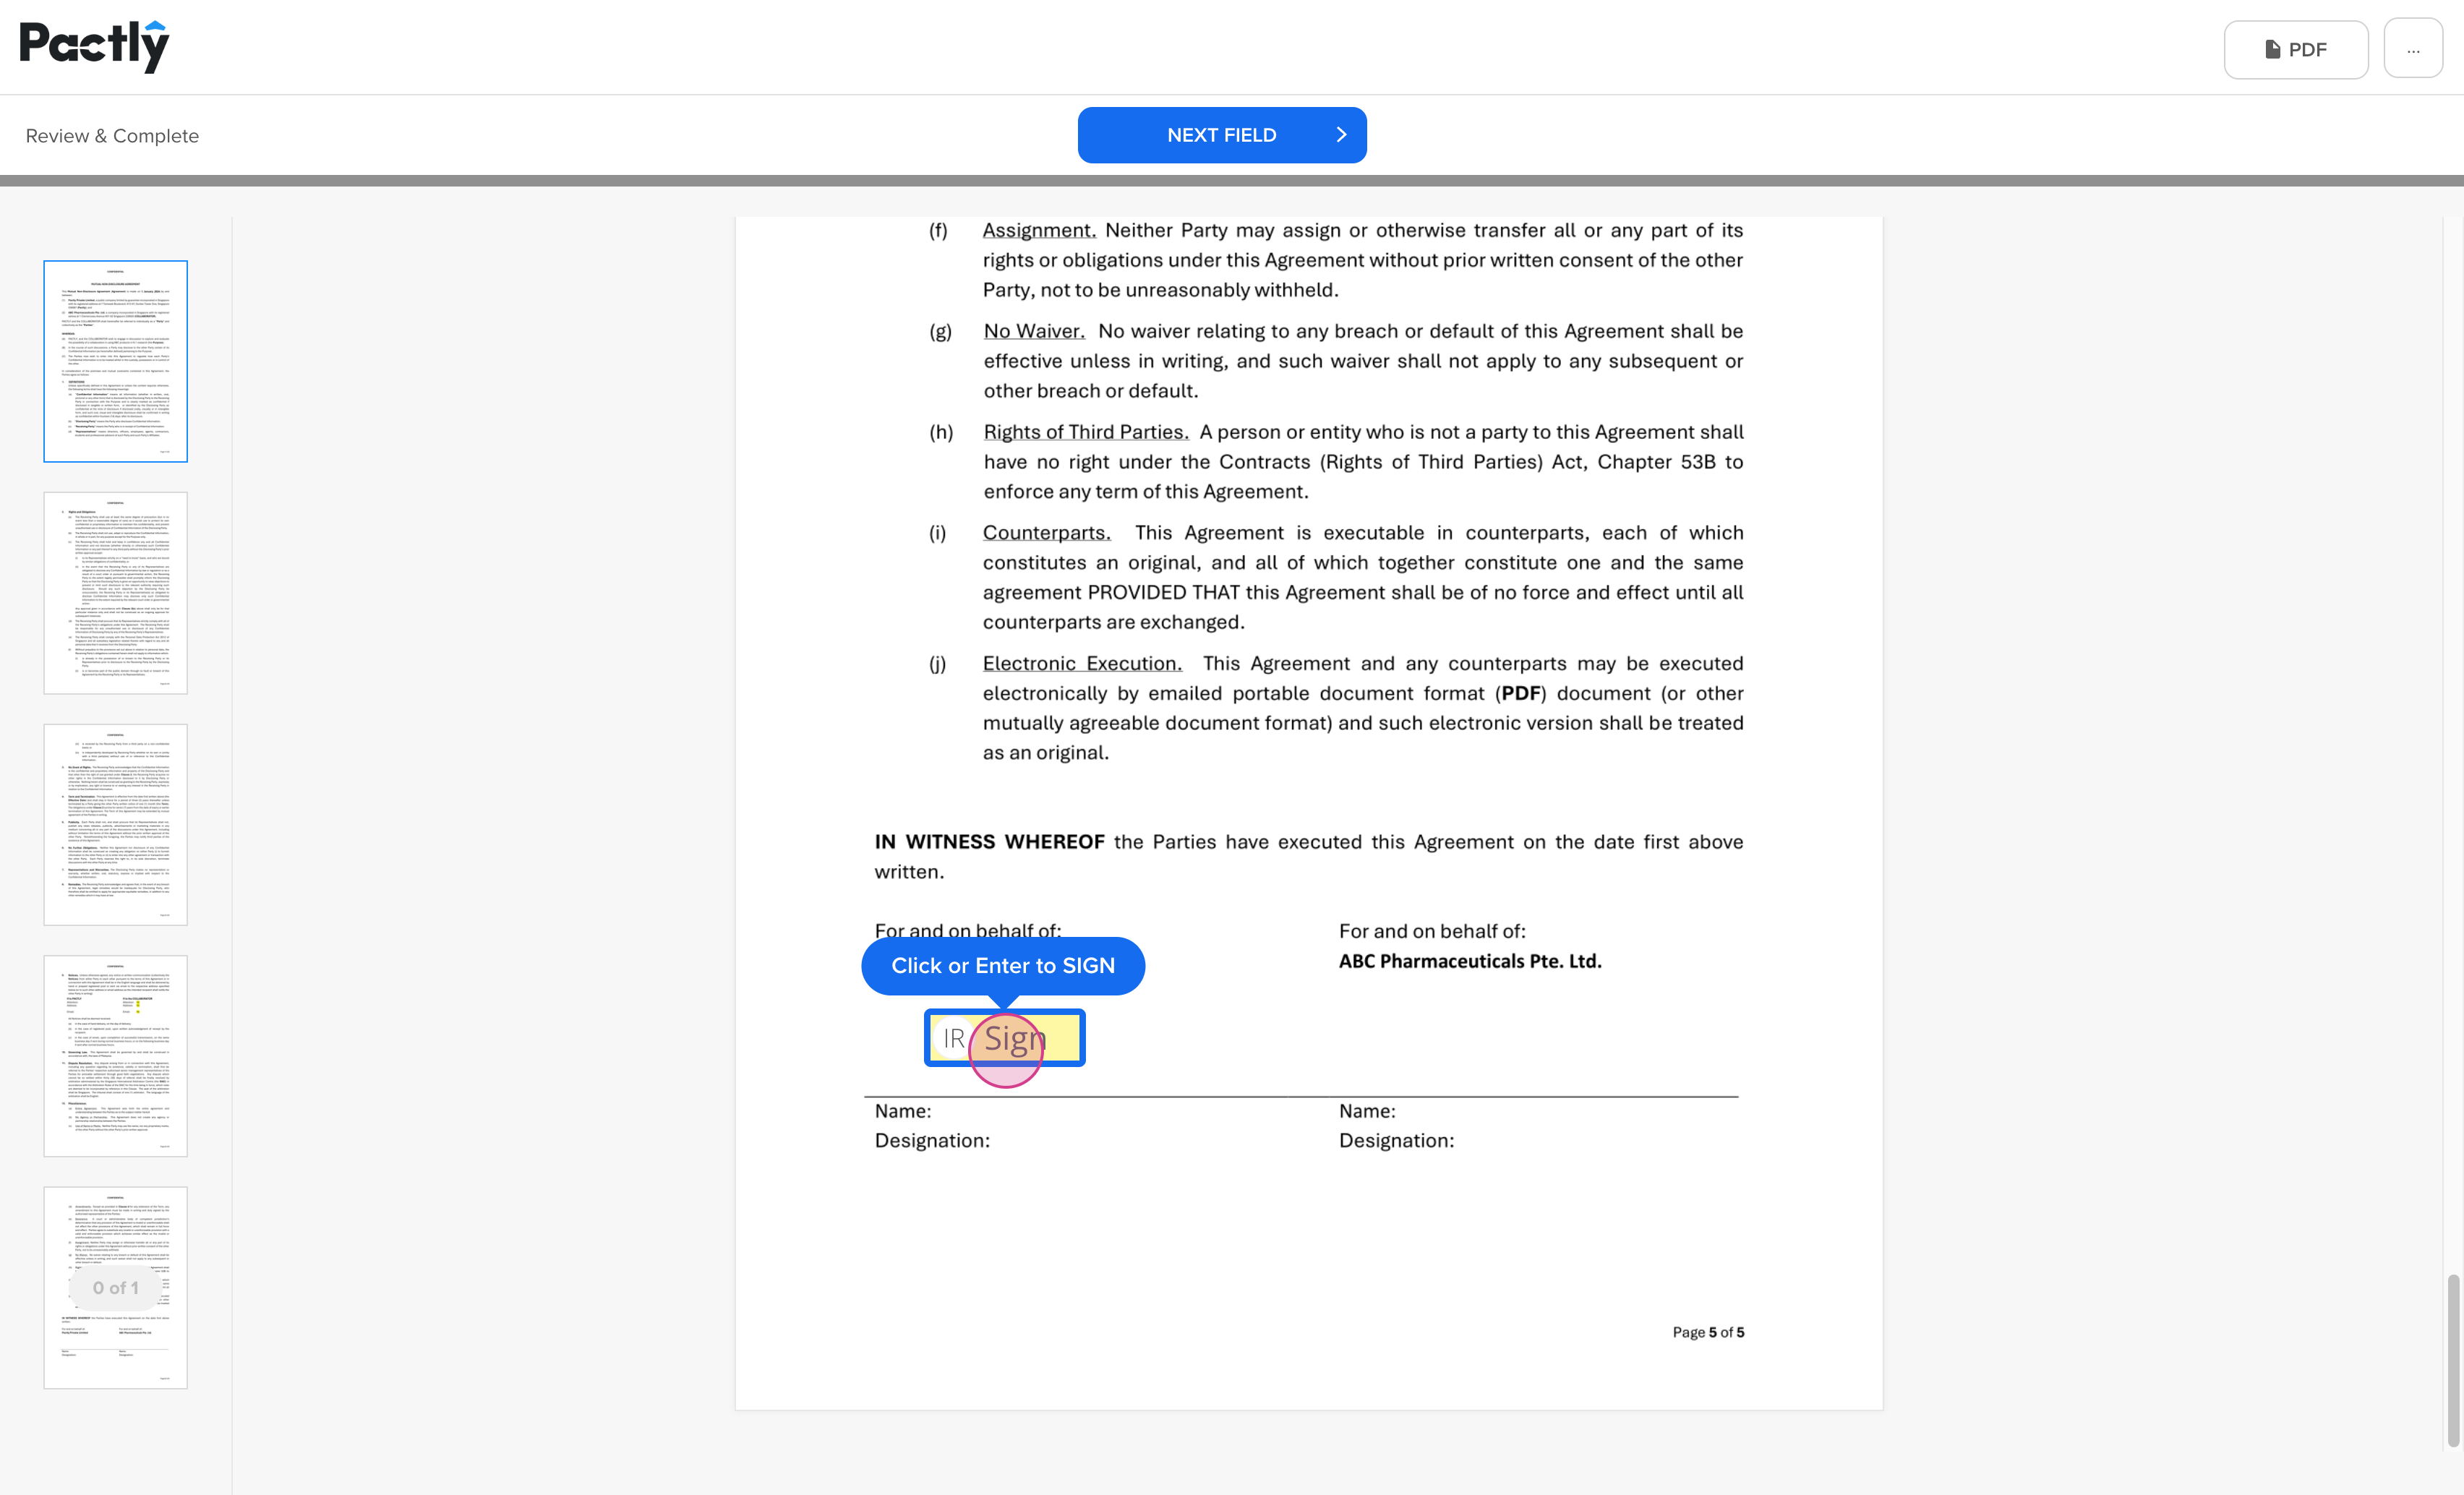
Step 5: Save Your Signature
Section titled “Step 5: Save Your Signature”When satisfied with your signature, click Save.
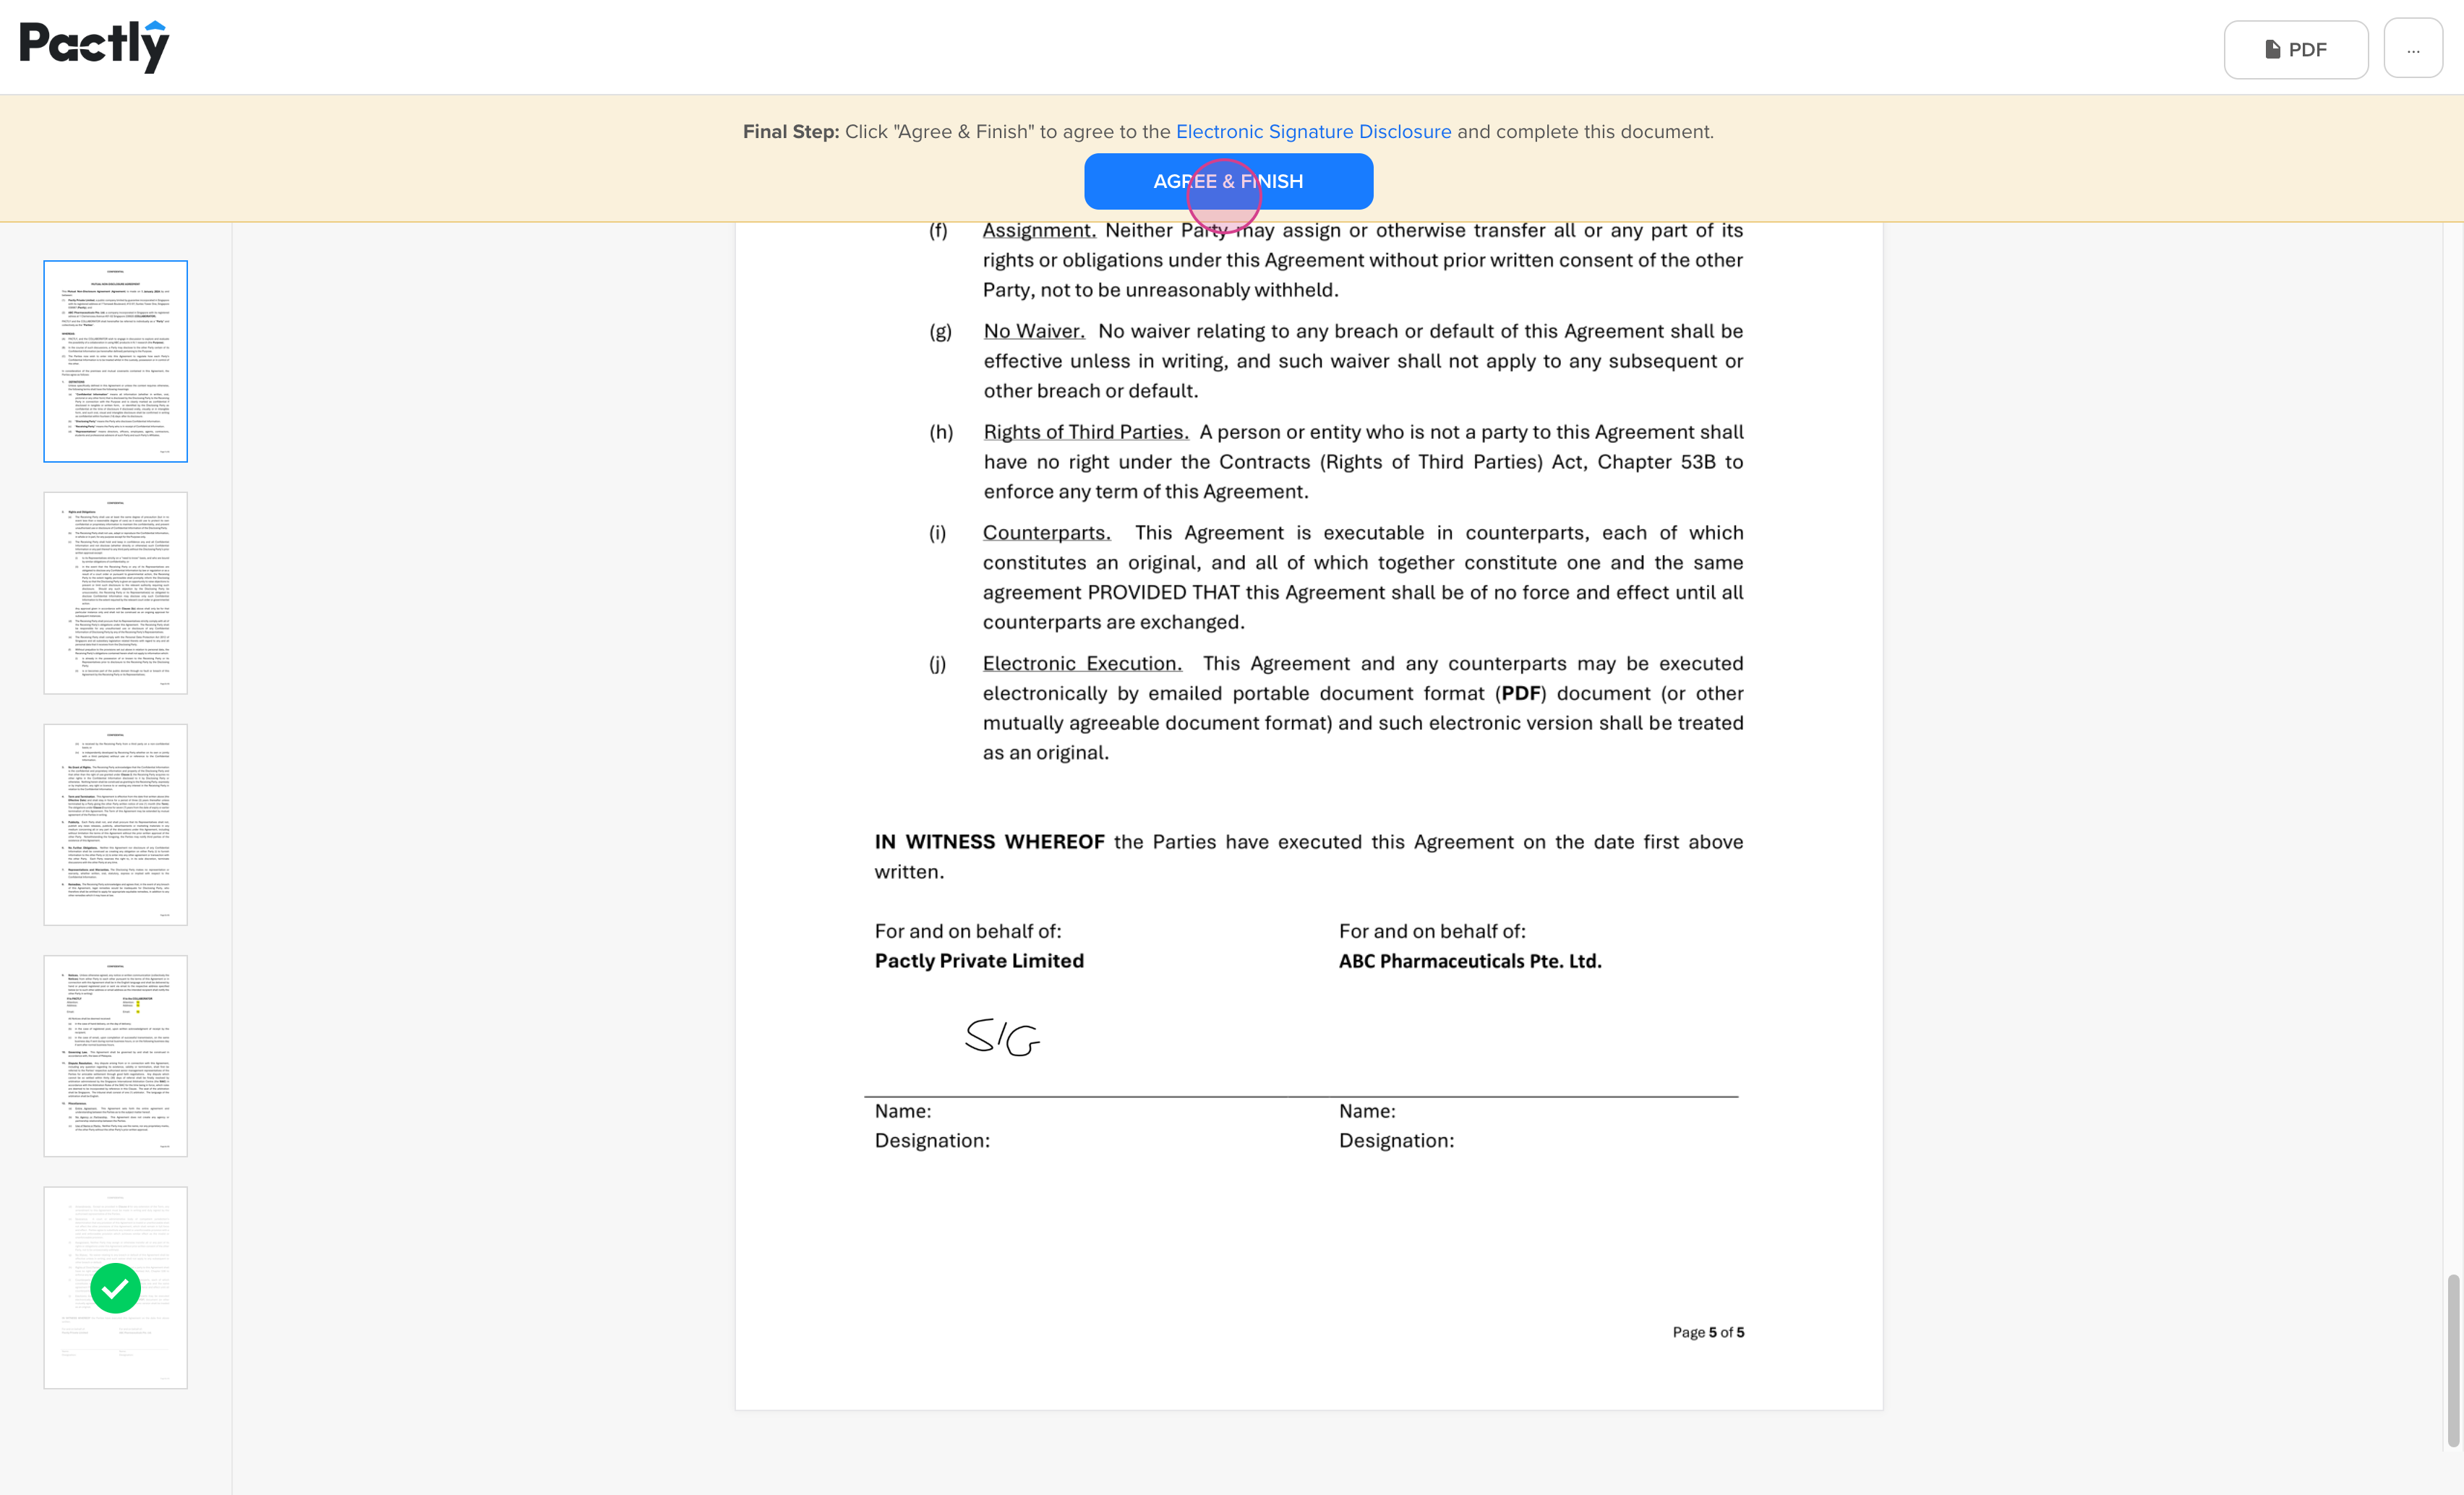
Step 6: Agree and Finish
Section titled “Step 6: Agree and Finish”Confirm your signature by clicking Agree and Finish.
Important: Make sure you complete this step — if you close the window early or skip this, your signature will not be registered and you’ll continue to receive reminders.
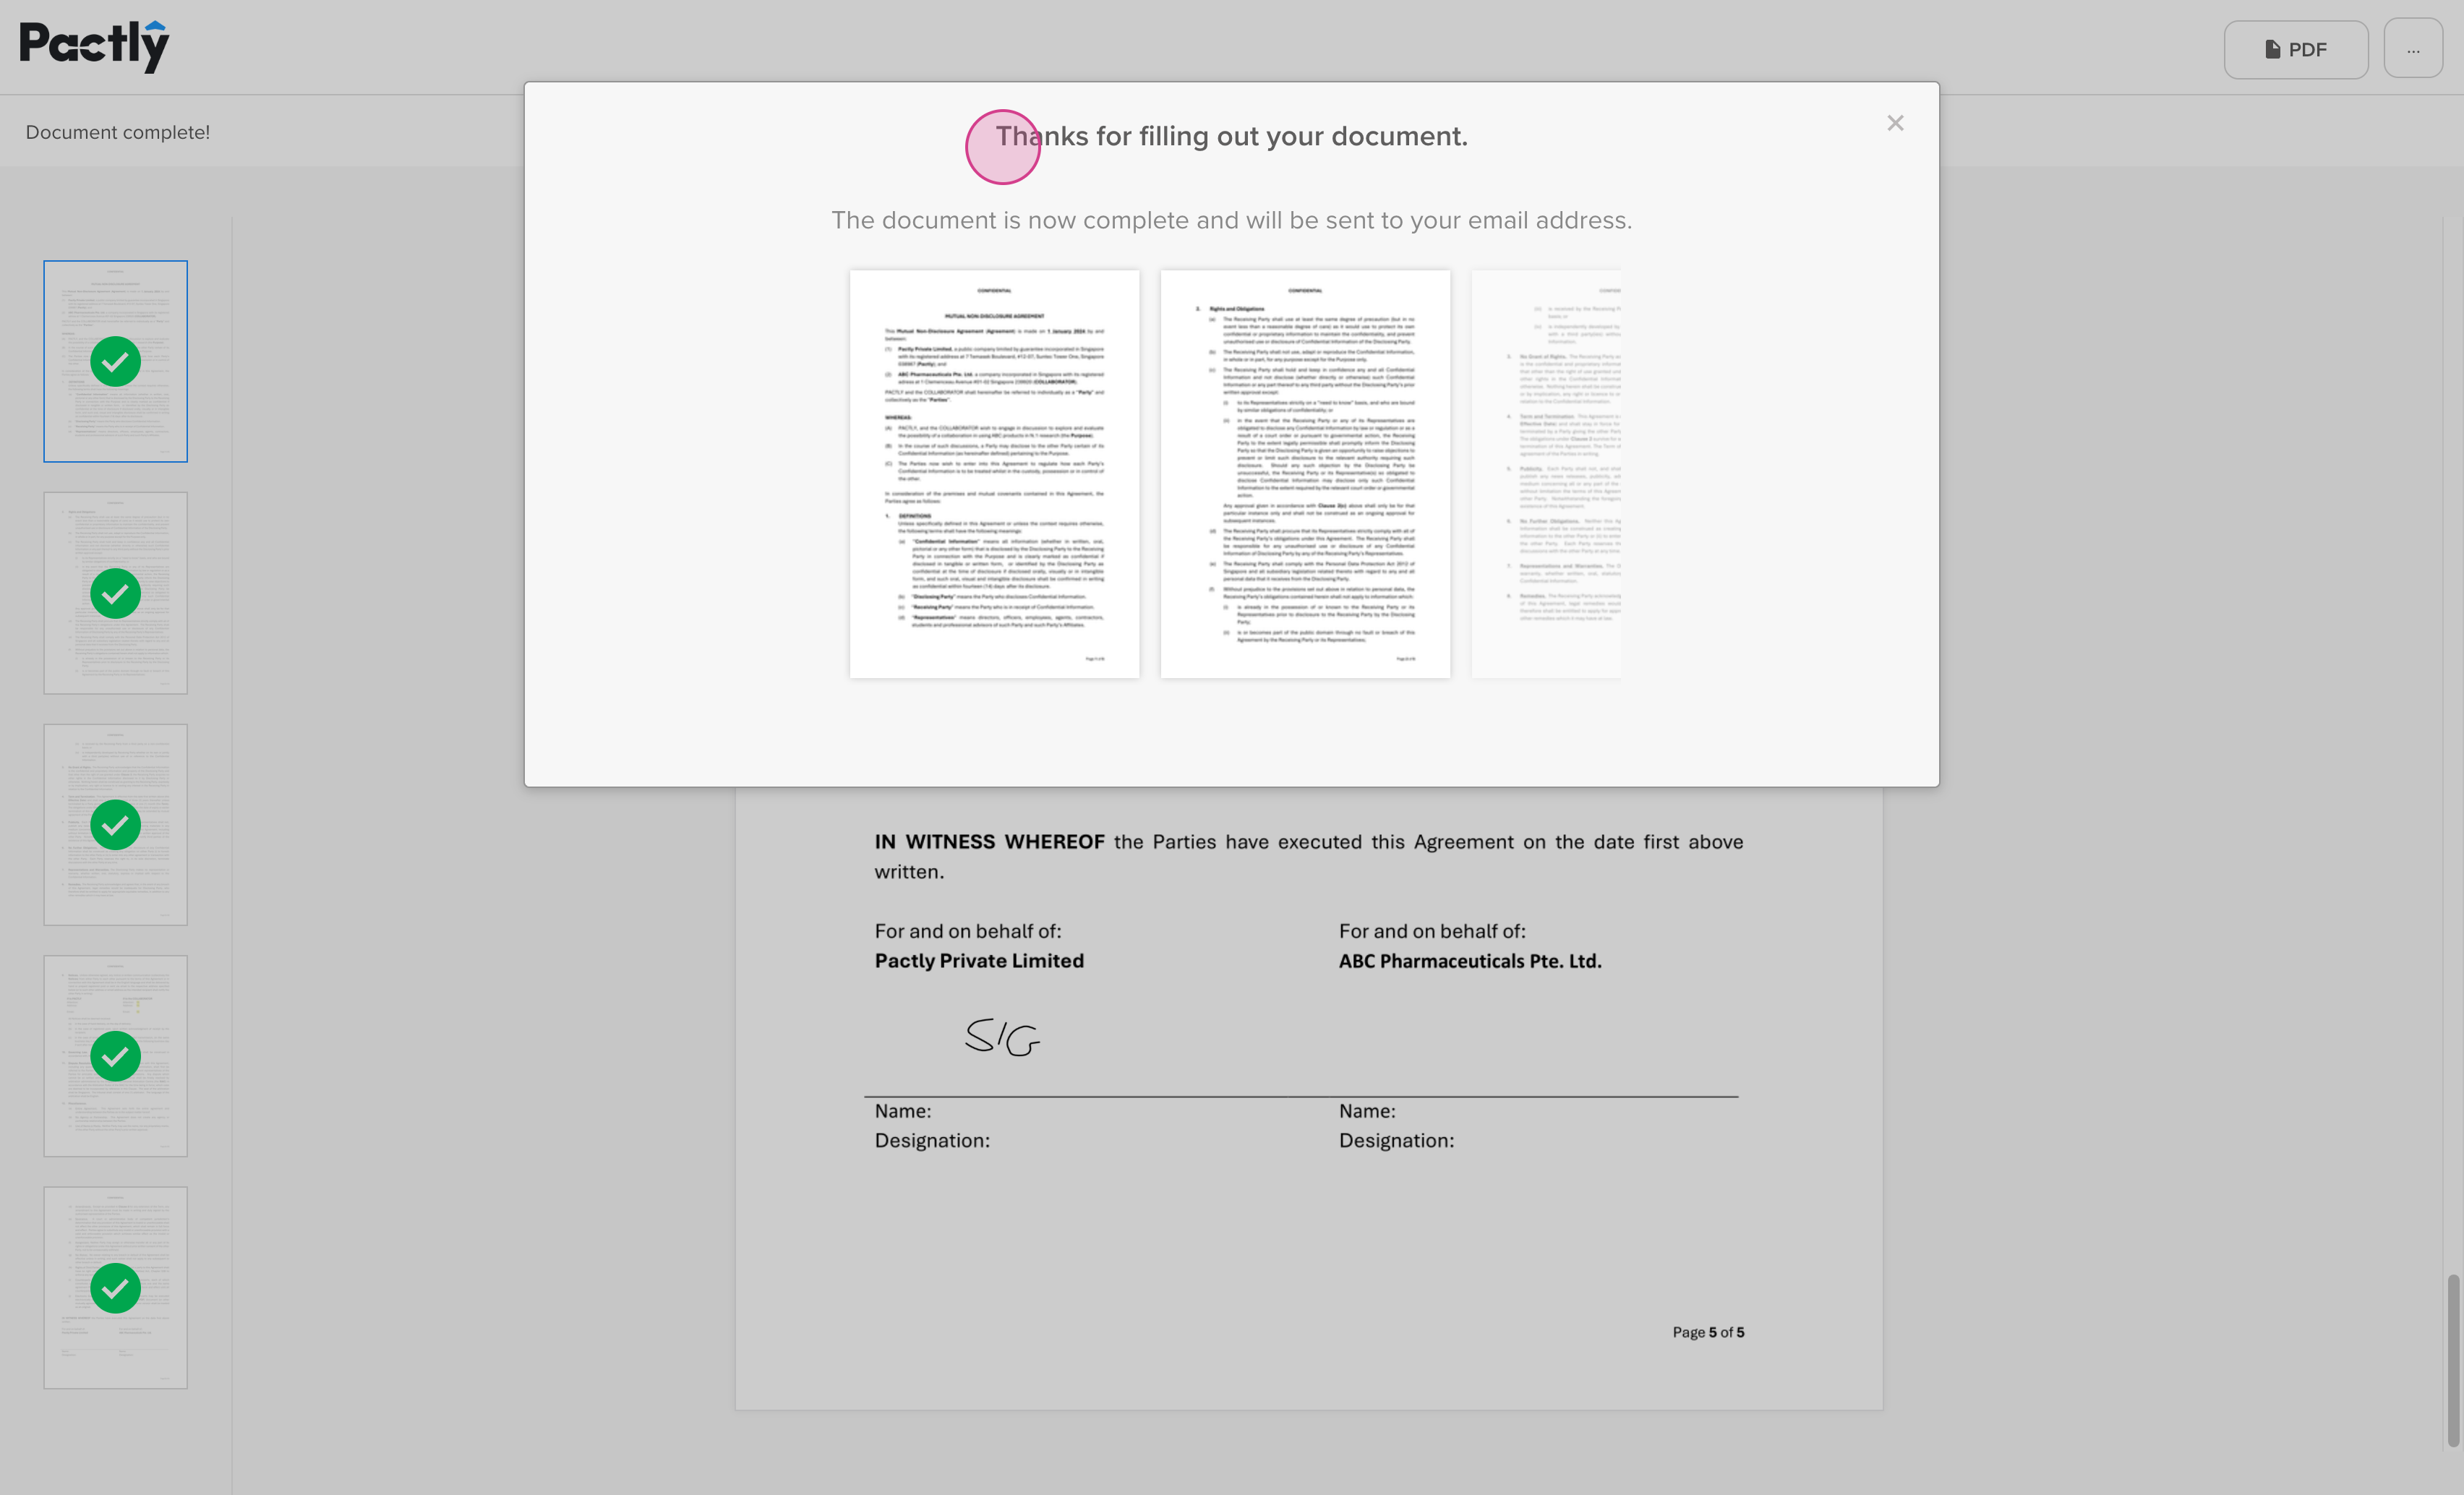
Step 7: Wait for Confirmation
Section titled “Step 7: Wait for Confirmation”After submitting, wait for the confirmation screen. Delays might happen due to network issues, but don’t close the window until you see a confirmation message.
When you see “Thanks for filling out your document,” you’re done and your signature is officially registered.