1
Click Create and select Draft a contract from my Template
Click the Create button in the top-left corner, then choose "Draft a contract from my Template" from the menu.
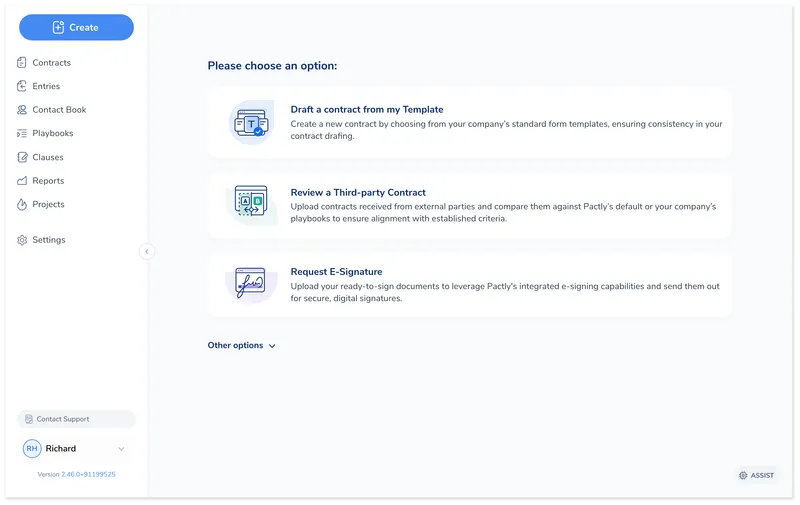
Pactly gives you three ways to bring contracts into the system, depending on where the document comes from and what needs to happen next.
Click Create in the top-left corner to see your options: draft from a template (your paper), review a third-party contract (their paper), or request an e-signature (ready to sign).
Your paper. Use this when you are initiating the contract using your organization’s standard language.
Templates contain pre-approved language with variables (party names, dates, deal terms) that get filled in through an intake form. Your admin configures which templates and forms are available.
Click the Create button in the top-left corner, then choose "Draft a contract from my Template" from the menu.
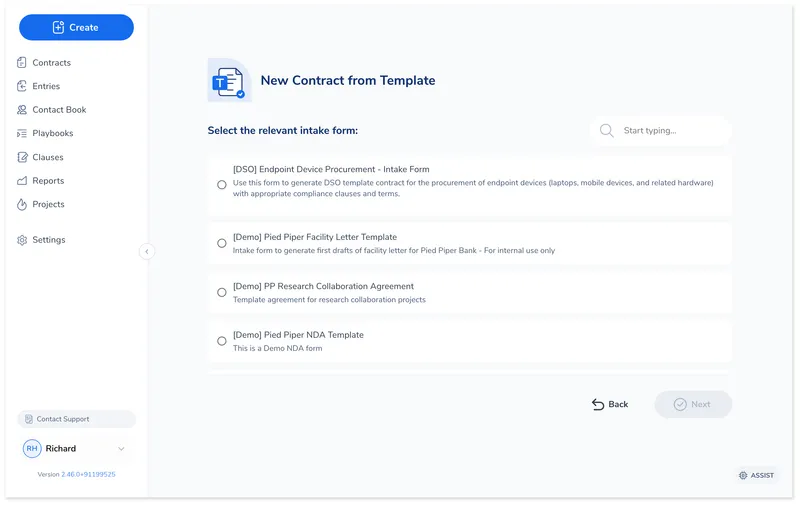
Choose the intake form linked to the template you need. Each form shows a title and description to help you pick the right one. Use the search bar to filter by name if your organization has many templates.
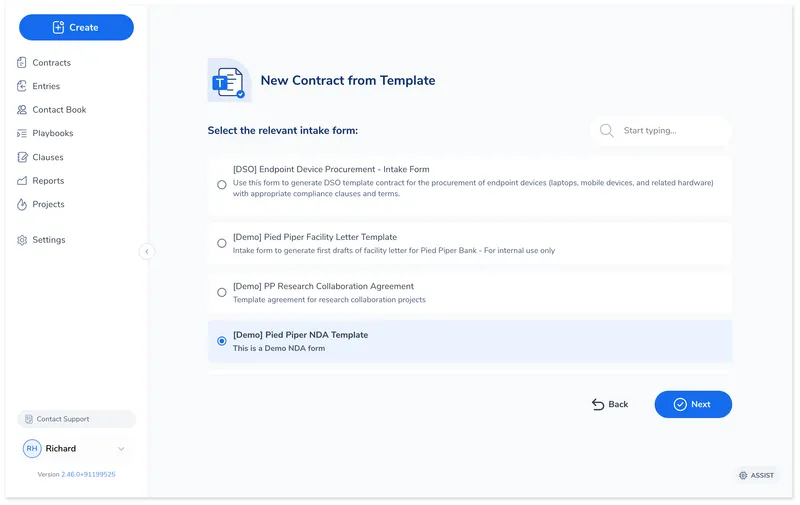
The selected form is highlighted. Click Next to open the intake form. The Back button returns to the Create menu if you need to change your selection.
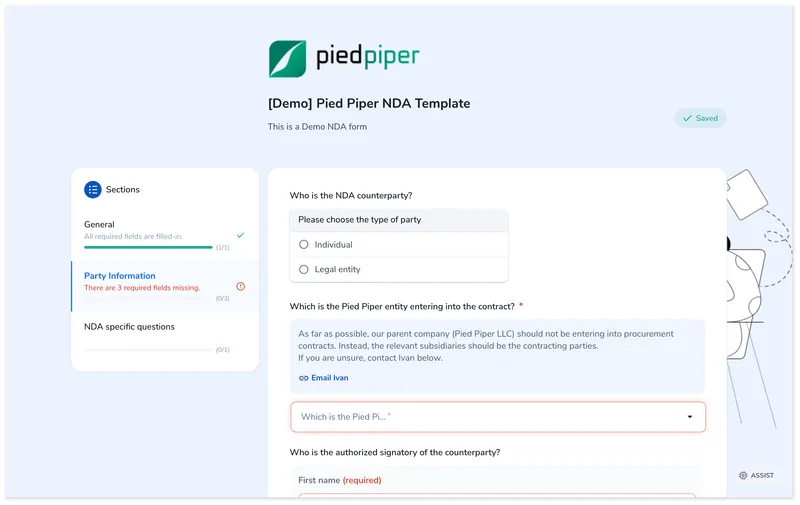
The intake form opens with sections listed in the left sidebar. Start with the first section and answer each question. In this example, the General section asks what type of NDA you need. Select the appropriate option and click Next Section to continue.

The Party Information section collects counterparty details: party type (Individual or Legal entity), the contracting entity from your side, and the authorized signatory. Fields marked with a red asterisk are required.
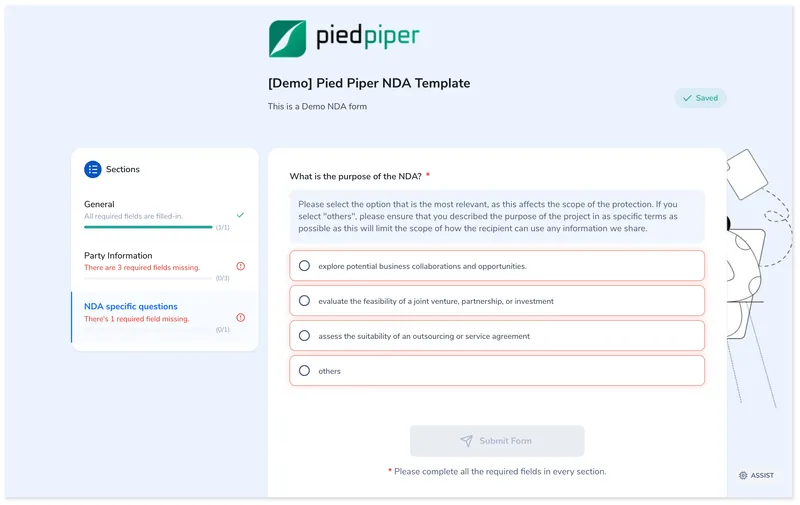
Continue through any remaining sections (here, NDA-specific questions about the purpose of the agreement). The sidebar shows completion status for each section. When all required fields are filled, click Submit form to generate the contract.
After submitting the form, Pactly generates the contract document with your standard language and the values you entered. The contract enters your repository in Draft status. From here, you can send it to the counterparty, route it for internal approval, or continue editing.
Third-party paper. Use this when you have received a contract from a counterparty and want to review it against your organization’s standards using a playbook.
Click the Create button, then choose "Review a Third-party Contract" from the menu.
Select how you want to create the contract. Use Intake Form if your admin has configured a structured intake process. Upload Document lets you upload the file directly and fill in details manually.

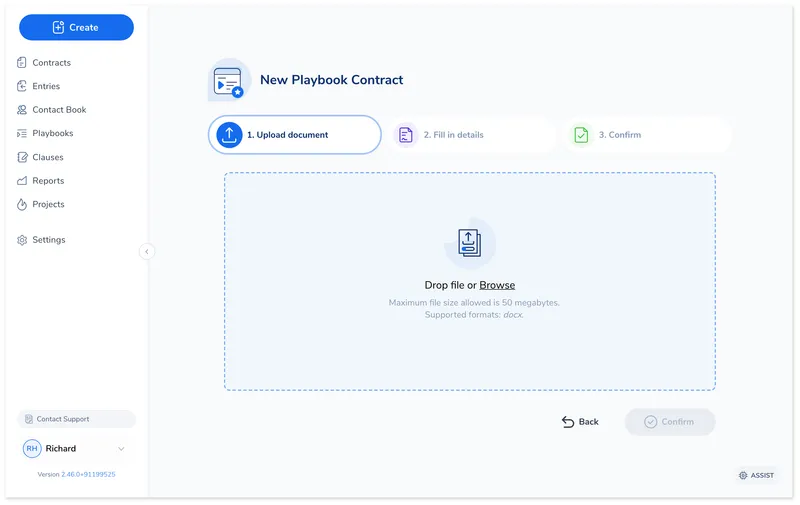
Drag and drop the contract file or click Browse to select it. Accepted format: .docx. The maximum file size depends on your organization's configuration.
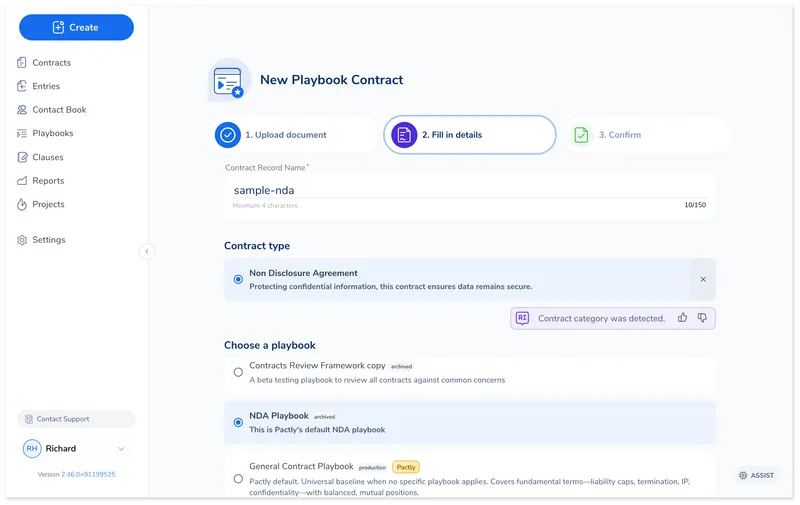
After the file uploads, the wizard advances to Fill in details. Pactly uses AI to detect the contract category (shown with a "Contract category was detected" badge). Enter a contract name, verify or change the category, and select the playbook to review against. The playbook list is filtered to show playbooks matching the selected category.
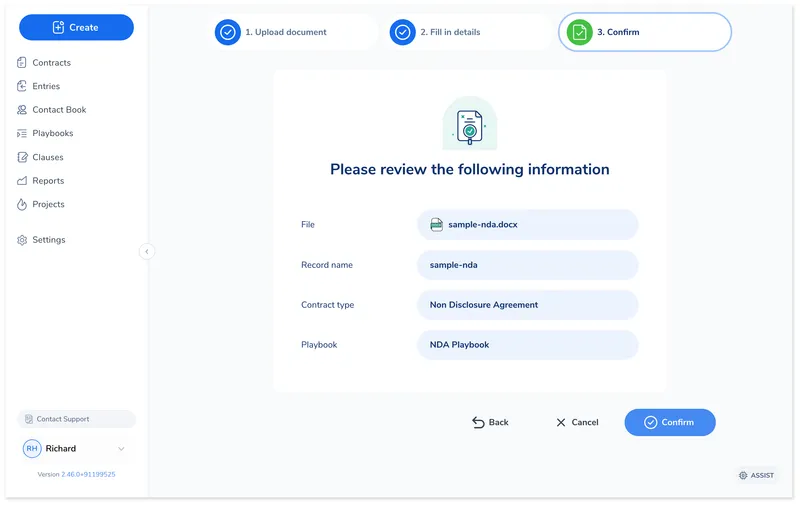
The confirmation screen summarizes everything: uploaded file, record name, contract type, and selected playbook. Verify the details are correct and click Confirm to create the contract.
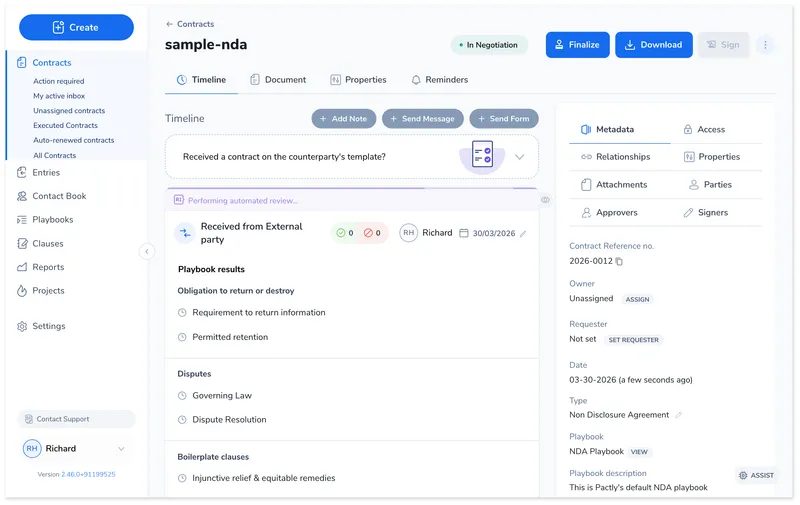
The contract enters your repository in In Negotiation status. Pactly runs an automated playbook review against the document, flagging positions that deviate from your organization’s standards. The results appear on the contract timeline.
Open the contract in Microsoft Word with Pactly Assist to review the flagged positions and begin negotiation. See Running a Playbook Review for the next steps.
Ready to sign. Use this when you have a finalized document that needs signatures. No further review or negotiation is needed.
The e-signature wizard guides you through four steps: upload the document, fill in details, configure signing settings, and confirm.
Click the Create button, then choose "Request E-Signature" from the menu.
Drag and drop the document or click Browse to select it. Accepted formats: .docx, .doc, .odt, and .pdf. The wizard shows a four-step progress bar at the top: Upload document, Fill in details, Set e-signature, and Confirm.

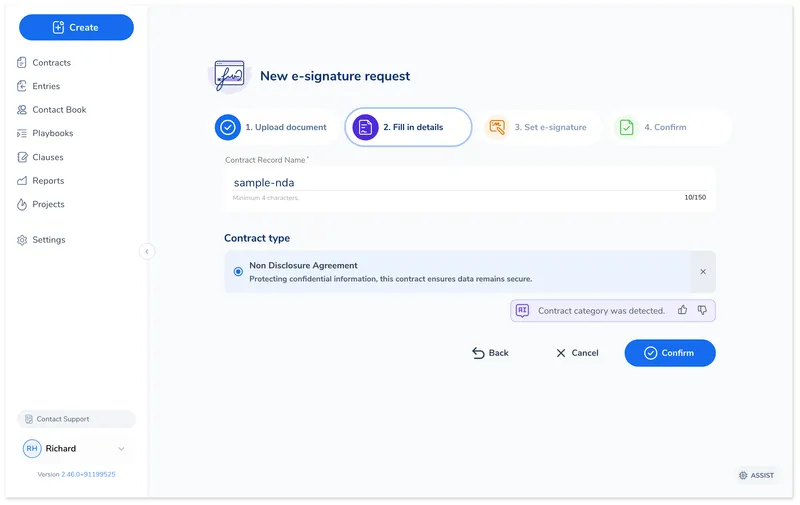
Enter the contract record name and select the contract category. If the AI detects the category from the document content, it is pre-selected automatically (shown with a "Contract category was detected" badge). Click Confirm to proceed to signature settings.
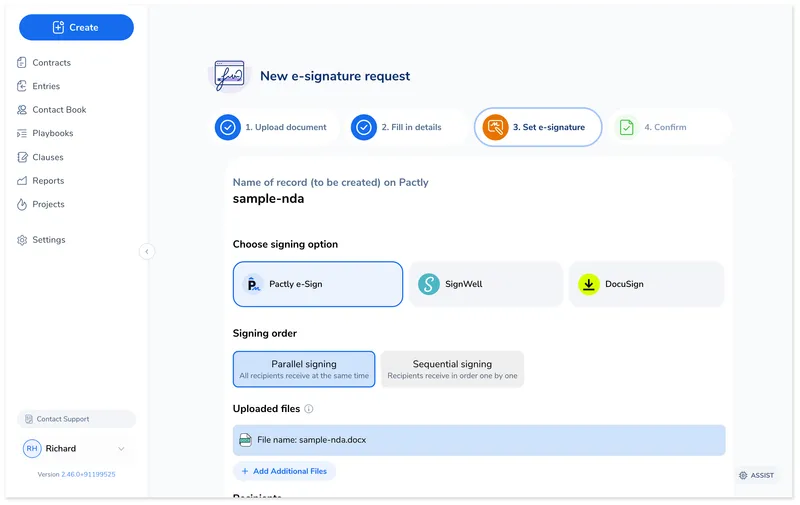
Choose your e-signature provider (Pactly e-Sign, SignWell, or DocuSign), select the signing order (Parallel for all signers at once, or Sequential for one after another), and review the uploaded files. You can add additional files to be combined into the signing package.
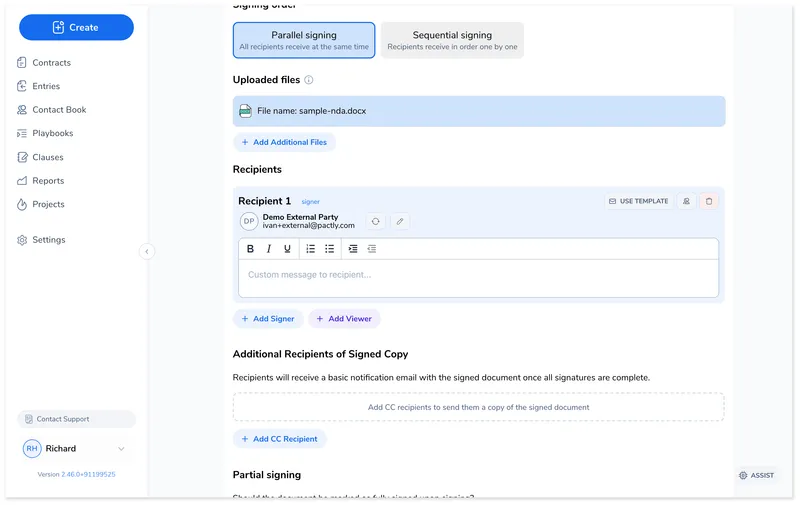
Scroll down to the Recipients section and click Add Signer. Search for contacts from your contact book or click New Signer to enter details manually. Each signer shows their name, email, and a message field for personalized instructions. You can also add Viewers (who see but do not sign) and CC Recipients (who receive a copy after signing completes). Choose whether the document should be marked as Fully Signed or Partially Signed upon completion.
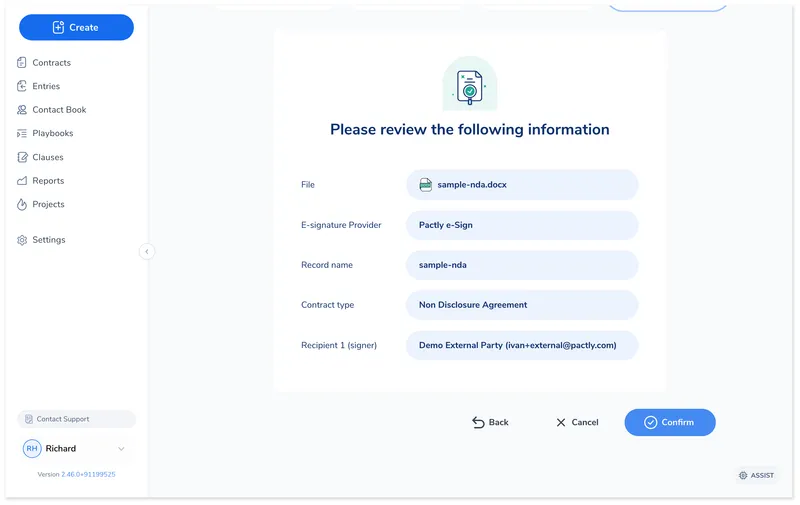
The confirmation screen summarizes the file, e-signature provider, record name, contract type, and all recipients. Verify everything is correct and click Confirm to send the signature request.
If using Pactly e-Sign, a signature editor opens after confirmation where you place signature fields, date fields, and initials on the document. Click Send Document when the fields are positioned.
The contract enters your repository in Pending Signature status. Signature progress is tracked automatically on the contract timeline.
After creation, every contract gets:
The contract appears in your repository and is visible to anyone with the appropriate group permissions.