1
Click Send Message above the timeline
Open the contract record and click Send Message in the action bar above the timeline feed. This opens the message composition dialog.
You need to send a counterparty the latest draft and ask them to confirm the payment terms, but you also want your team to see what was sent and when. Doing this from your regular email client means the conversation lives outside the contract record, invisible to colleagues who may pick up the negotiation later.
The Send Message action on the contract timeline lets you email external parties directly from a contract. The message, recipients, and attachments are all recorded on the timeline, and replies are captured automatically.
For an overview of the timeline and its action buttons, see Contract Timeline.
Open the contract record and click Send Message in the action bar above the timeline feed. This opens the message composition dialog.
In the To field, search for existing contacts or type any email address. Add CC recipients if needed. Compose your message in the rich text editor, which supports bold, italic, lists, and links. Optionally select a template from the Use Template dropdown to populate the body with pre-saved content.
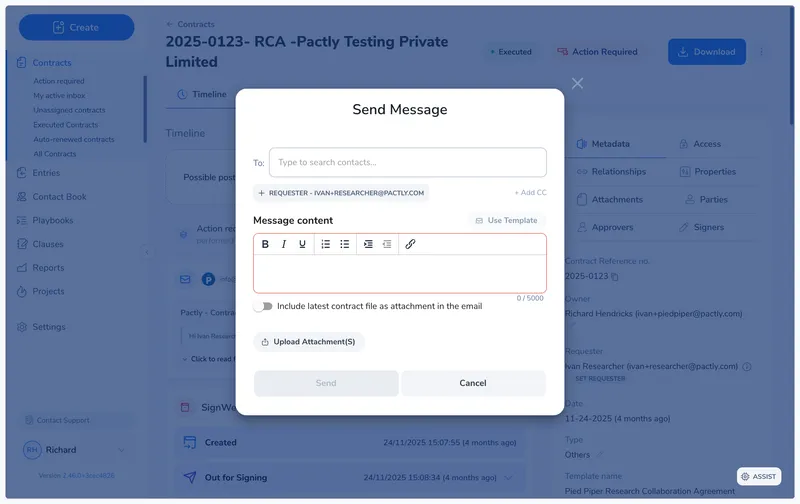
Upload files from your computer using the attachment area, or toggle on "Include latest contract file as attachment" to automatically attach the current version of the contract document. Both options can be used together. Click Send to deliver the email.
The sent message immediately appears on the contract timeline with the full recipient list, message content, and any attachments, giving your entire team visibility into the communication.
If your team sends similar messages regularly, such as review requests, follow-up reminders, or signature instructions, email templates save time and keep messaging consistent.
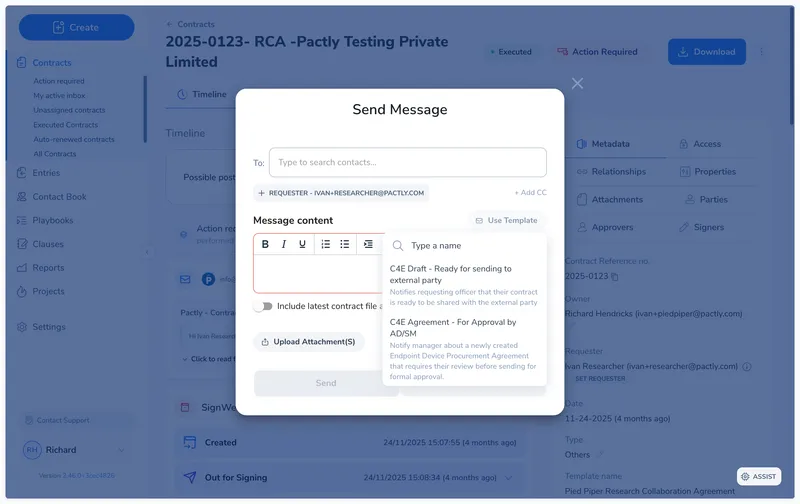
Select a template from the Use Template dropdown, and the message body is populated with the template content. You can edit the populated text before sending if you need to adjust it for the specific contract or recipient.
Templates are particularly useful when the core message stays the same but details like party names, clause references, or deadlines vary between contracts.
You have two ways to attach files to a message:
Both options can be used together in the same message. Attachments are included inline in the email, so recipients can download them directly without needing to log into Pactly.
Recipients receive a standard email from Pactly with your message content and any attachments. The email includes a reply-to address that routes responses back to the contract (see below). Recipients do not need a Pactly account to receive or reply to messages.
The sender name shown in the email is your name as configured in your Pactly profile. If your organization has set up a custom company logo, it appears in the email header as well. See Company Logo on Emails for details on branding configuration.
Every contract in Pactly has a dedicated email address (e.g., [email protected]). When you send a message from the contract, this address is set as the reply-to header automatically.
When recipients reply to your message, their response is routed to the contract and appears on the timeline as an incoming email event. You do not need to manually add replies or forward them. As long as the recipient replies to the email they received (keeping the reply-to address intact), the response is captured.
This means the full back-and-forth conversation between your team and external parties builds up on the timeline over time, creating a complete audit trail for the contract.
If someone communicates about the contract through a separate email thread that was not started from Pactly, those messages are not tracked automatically. To keep the timeline complete, you have two options:
Sent messages behave like other timeline items. You can:
These actions are available through the action buttons on the right edge of the timeline item. For details, see Contract Timeline > Managing Timeline Items.