Navigating the Contract Repository View
In this tutorial, you’ll learn how to navigate and customize the Contract Repository view in Pactly. By the end, you’ll be able to efficiently manage and organize your contracts.
Video Walkthrough
Section titled “Video Walkthrough”Step-by-Step Instructions
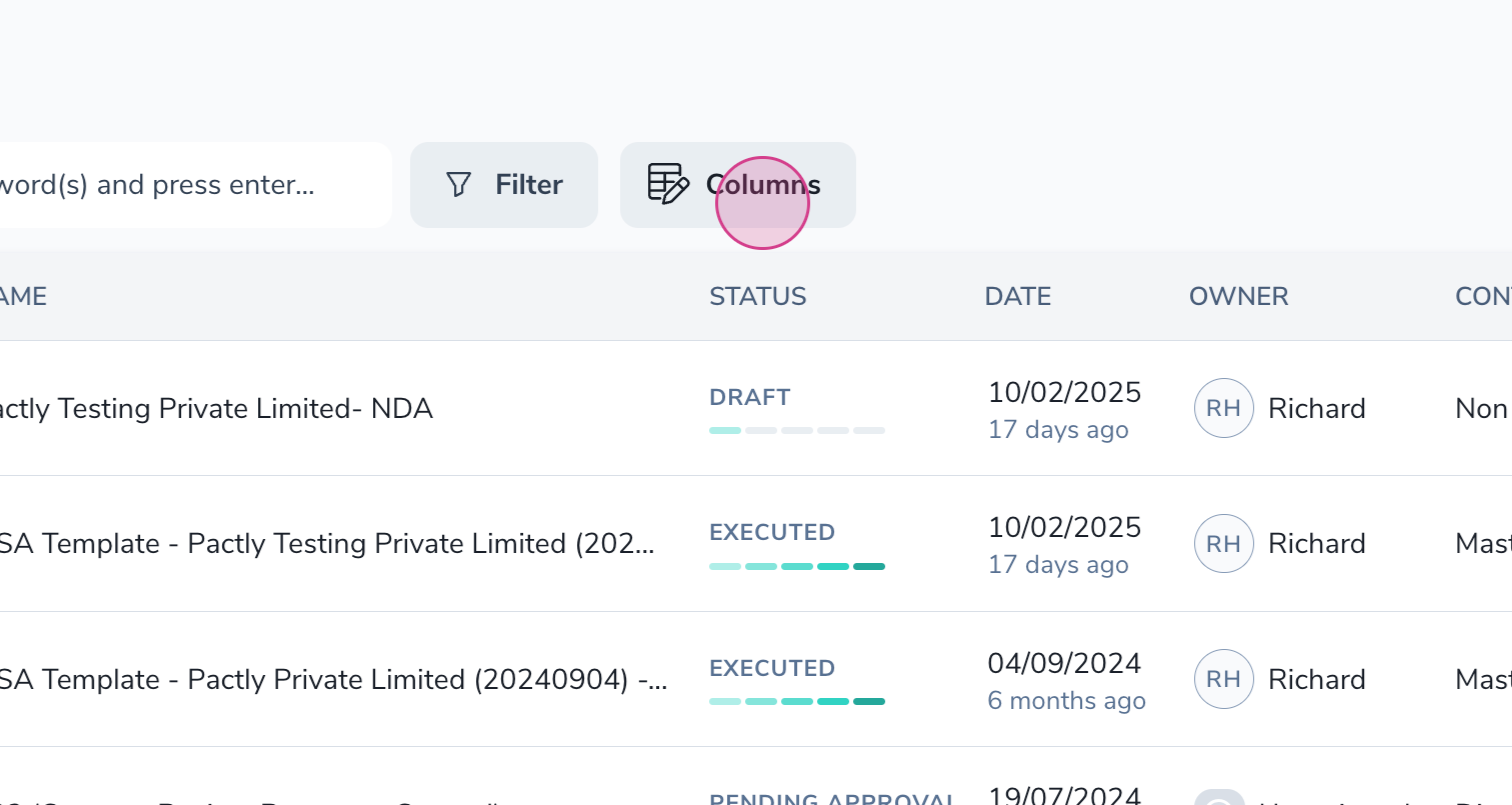
Section titled “Step-by-Step Instructions”Step 1: Log into your Pactly account. The first screen you’ll see is the Contract Repository view, which lists all the contracts you have access to.

Step 2: Review the details of your contracts. The view displays the reference number, name, status, assigned contract owner, and contract type for each contract. Hover over any contract in progress to see more details about its status.

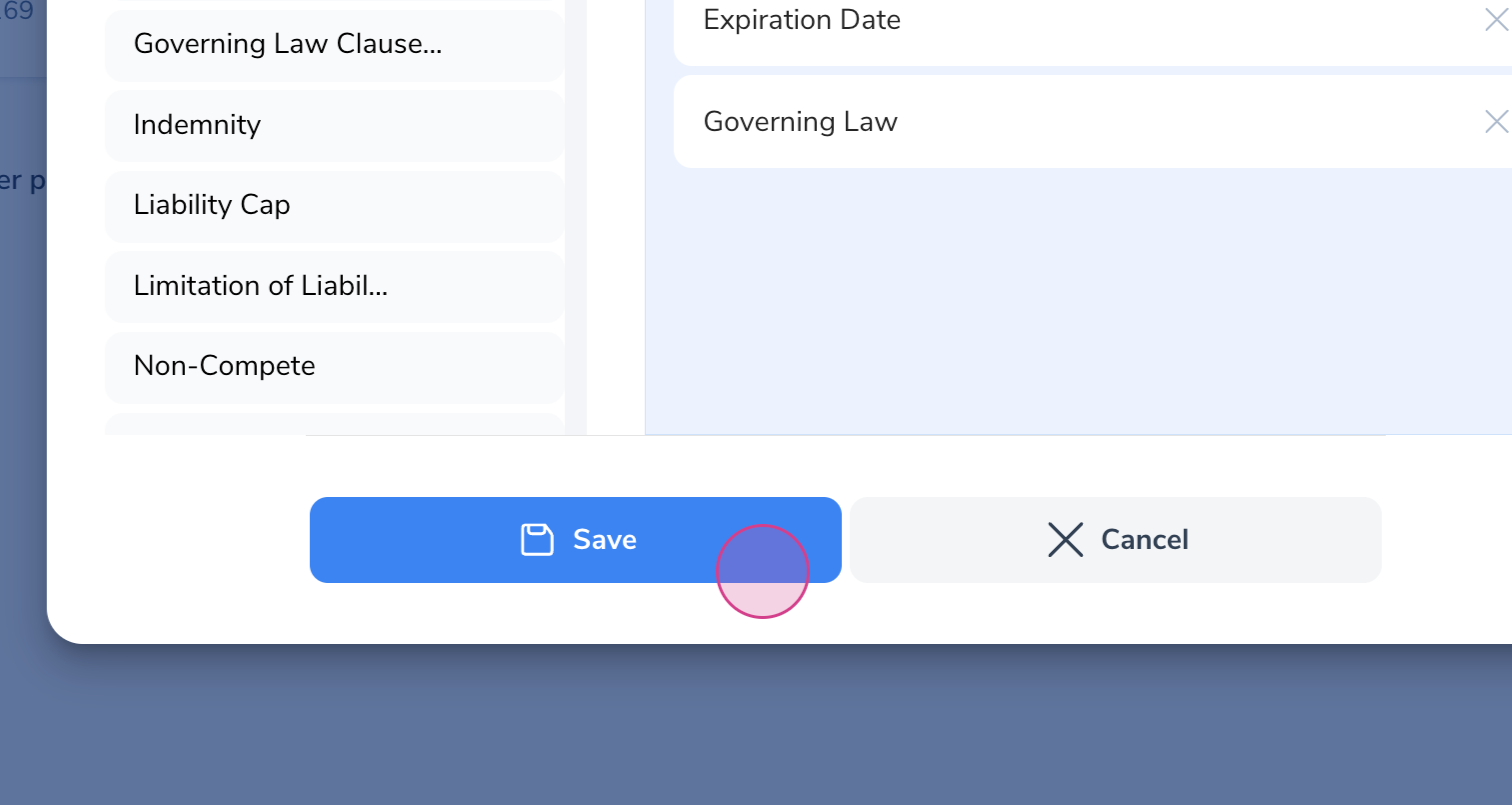
Step 3: Customize the columns in your view. Click Column Settings to add or remove columns based on your preferences.
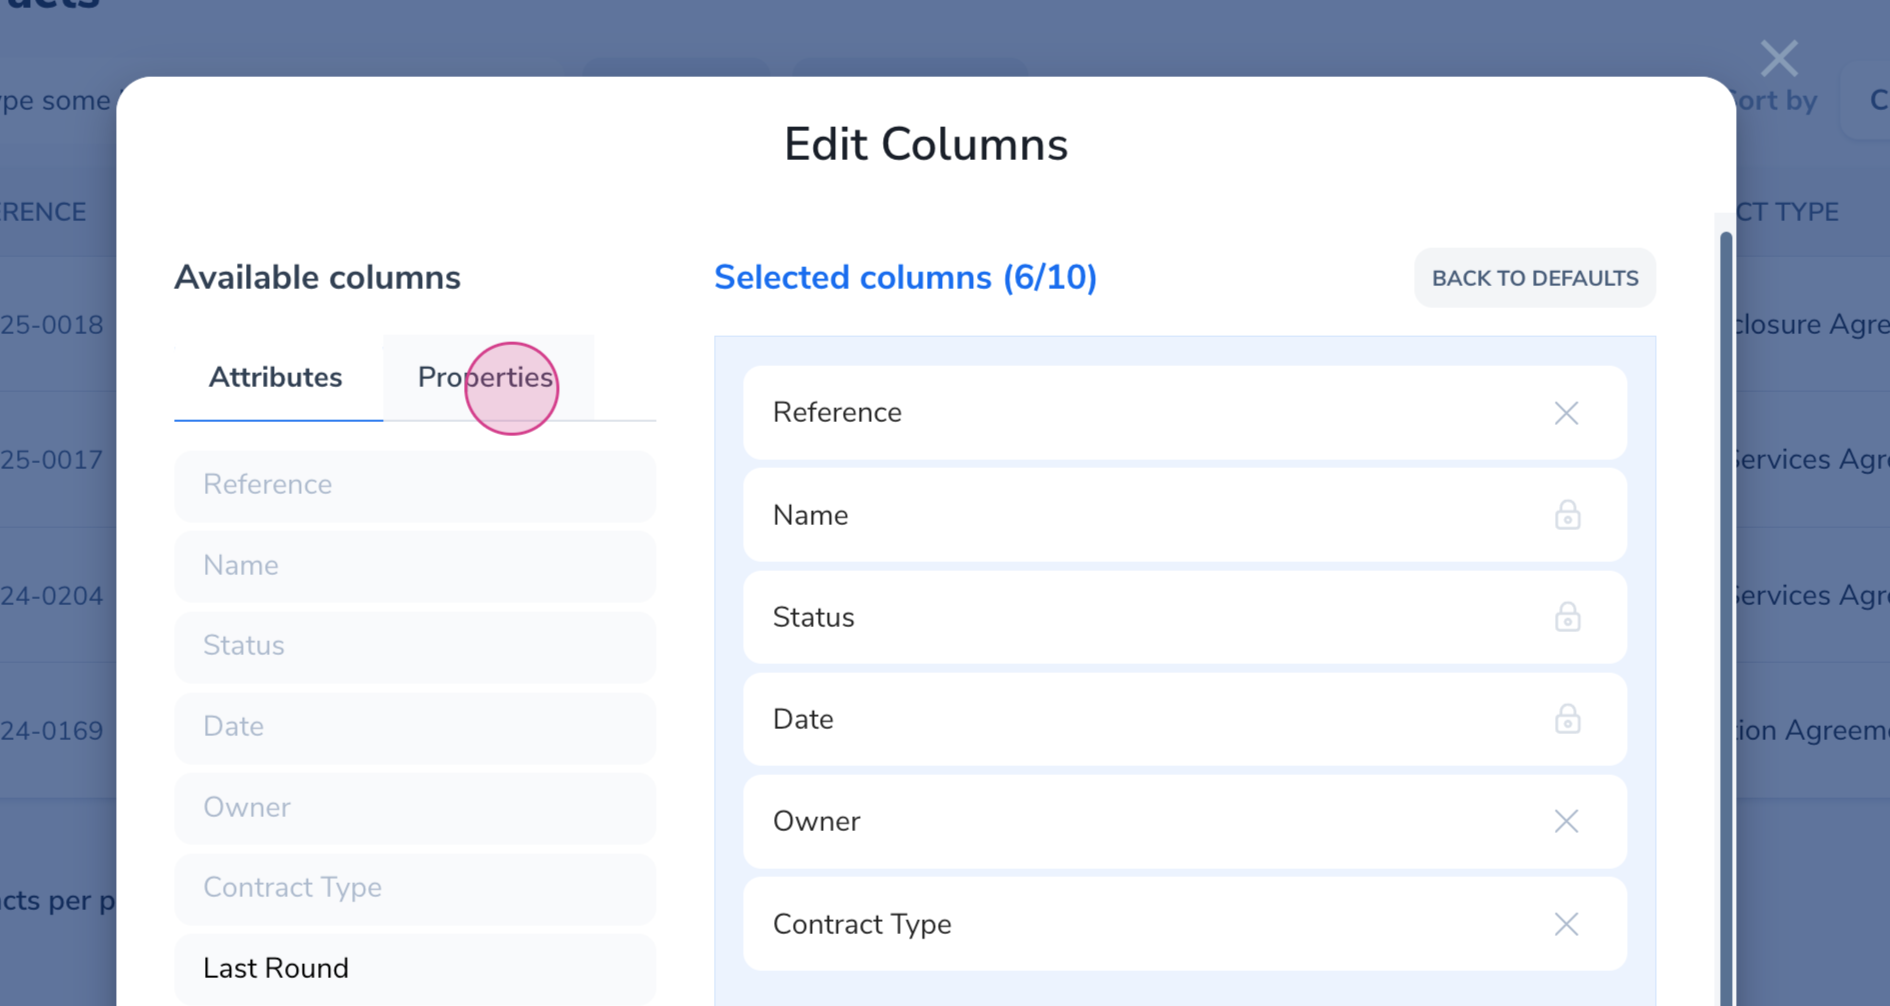
Step 4: Add columns that matter to you, like the expiration date or governing law of the agreement.
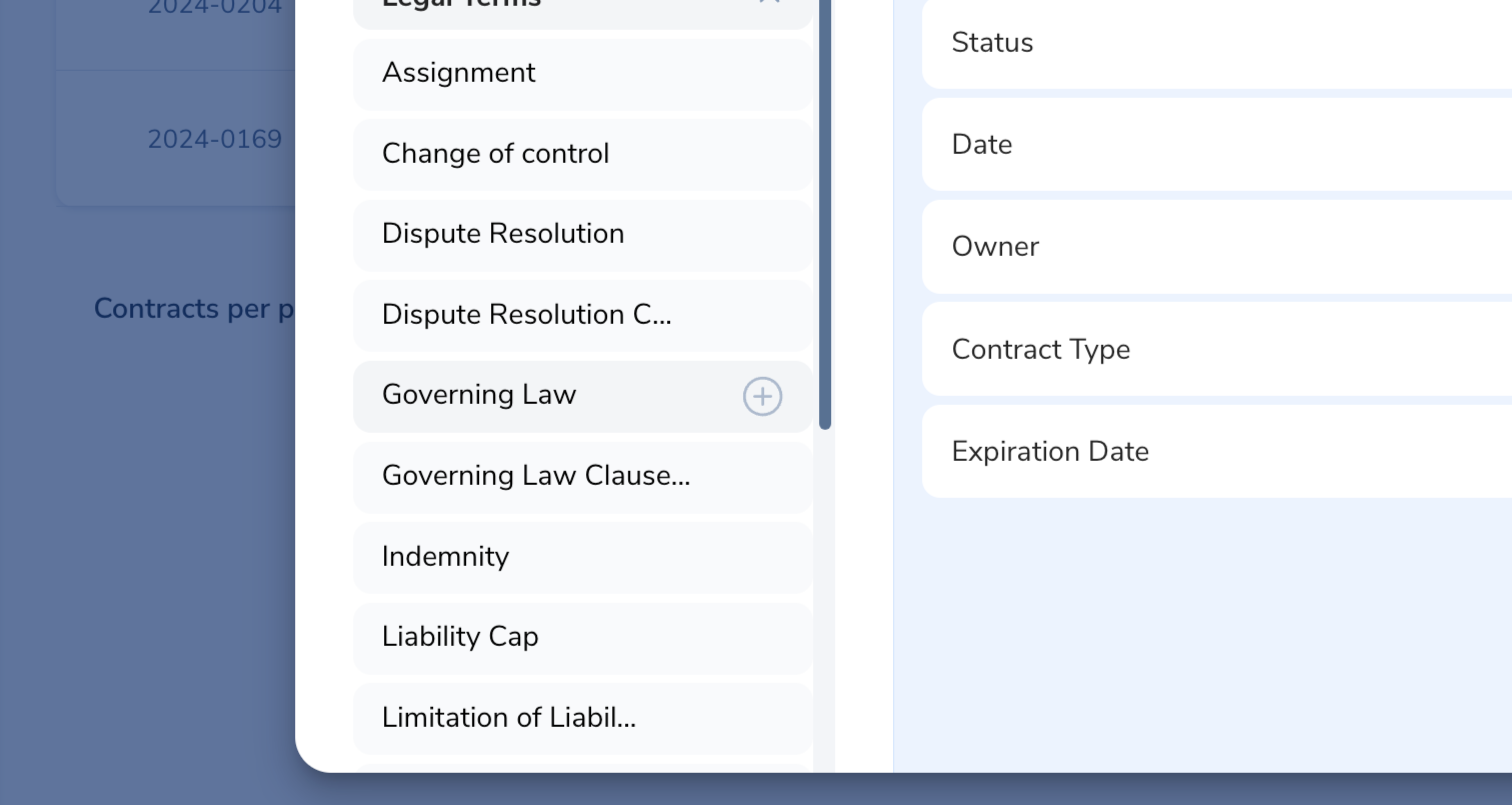
Step 5: Click Save to apply your changes. If data exists for the new columns, it’ll appear in the view.
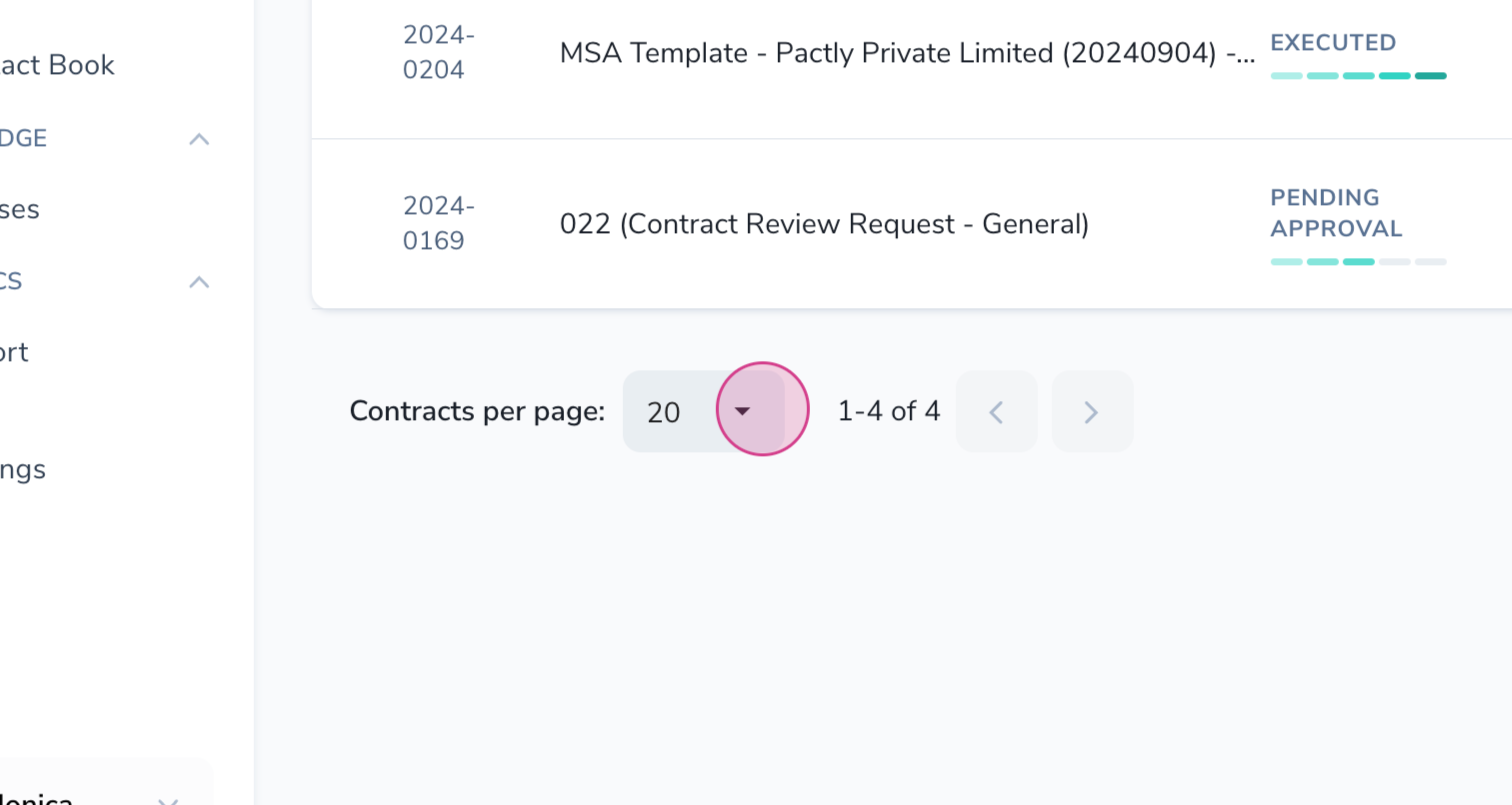
Step 6: Adjust the number of records shown per page. If you have many contracts, paginate them to make the view more manageable.
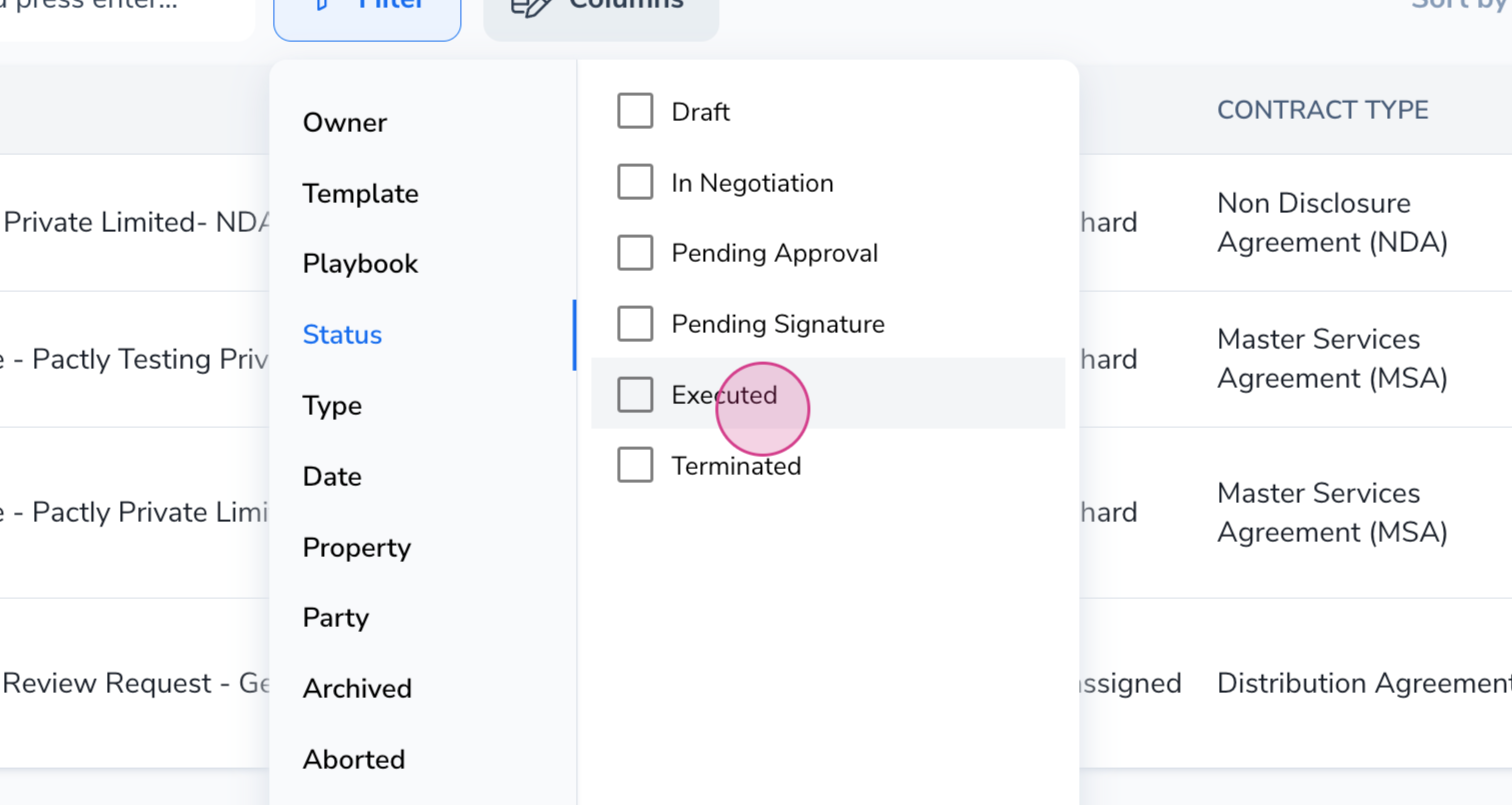
Step 7: Use filters to narrow down your contracts. For instance, filter by status to only see executed contracts.