Sharing Forms and Managing Entries
Building a form is half the job. The other half is getting it to the right people and managing the submissions that come back. Pactly distributes forms through a shareable permalink for external or broad use, and surfaces them under the Create button for your own team, then gives you a full entries interface for tracking, filtering, and exporting submissions.
Sharing a Form
Section titled “Sharing a Form”There are two ways people reach a form: a public permalink you send out, and the Create button inside Pactly for your own team.
Permalinks
Section titled “Permalinks”A permalink is a public URL that anyone can use to fill the form. Anyone with the link can open and submit it, as many times as they need, without a Pactly login. It’s the way to collect submissions from people outside your organization or to share a form broadly, for example embedded in an internal portal or sent by email.
Click Share in the form header, then Create permalink to generate the link. Copy it and share it however you like.
Each form has a single active permalink. To turn it off, click Delete permalink. The existing link stops working immediately, and you can generate a fresh one later.
Warning: Anyone who has the permalink can submit the form an unlimited number of times. To make sure the submissions you receive are legitimate, pair the permalink with an email domain whitelist (below).
Starting a form from the Create button
Section titled “Starting a form from the Create button”People who already work in Pactly don’t need a permalink. A form that generates or creates a contract appears under the Create button, so a requester can start it directly from inside the app. Forms with a generate action show up under “Draft a contract from my template,” and forms with a create action show up as an intake form option.
This is the everyday path for internal requesters: open Create, pick the form, and fill it in. Permalinks are for everyone else.
Email domain whitelist
Section titled “Email domain whitelist”In form settings, you can set an Email domain whitelist: a comma-separated list of domains. When it’s set, only submissions from those email domains are accepted, and a submission from any other domain is rejected before it’s saved.
This keeps the submissions you receive legitimate. For an internal-only form, restrict it to your own domain (for example yourcompany.com) so a stray permalink can’t be used by anyone outside the organization.
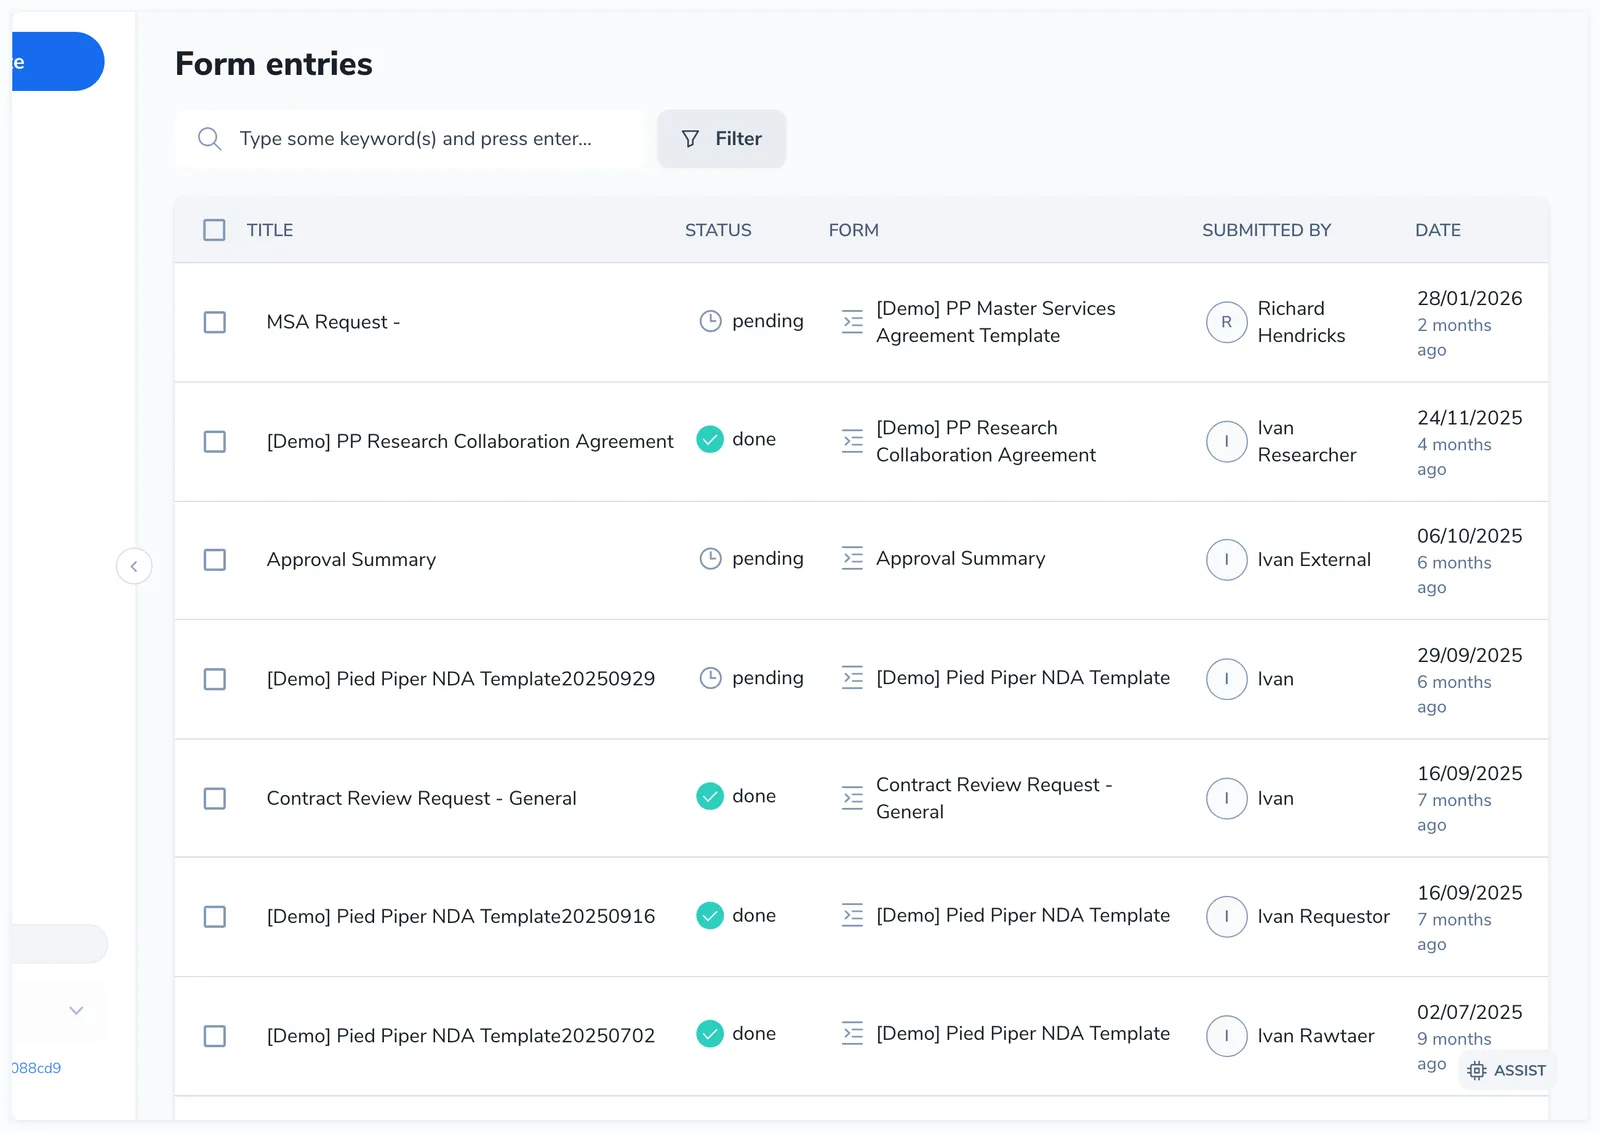
Managing Form Entries
Section titled “Managing Form Entries”The Form entries page shows all submissions across all forms. Access it from the left sidebar.
The entries table
Section titled “The entries table”| Column | Description |
|---|---|
| Title | The entry’s title (auto-generated from naming tokens or the form title) |
| Status | Pending (clock icon) or Done (checkmark icon) |
| Form | Which form this entry belongs to (with a “(deleted)” label if the form was removed) |
| Submitted by | The user who filled the form (shows name and email for external users) |
| Date | When the entry was created |
Click any row to view the full entry with all submitted values.
Filtering entries
Section titled “Filtering entries”Use the filter bar at the top to narrow the list:
| Filter | What it narrows |
|---|---|
| Search | Keyword match across entry titles and values |
| Owner | Entries belonging to a given form owner |
| Form | Entries from a specific form |
| Submitted by | Entries from a given submitter |
| Date | Entries within a submission date range |
| Status | Pending or done entries |
| Archived | Whether archived entries are shown |
Active filters appear as removable chips below the filter bar. Click “Remove all” to reset.
Entry actions
Section titled “Entry actions”Hover over an entry row to see action buttons:
- Archive - Move the entry to the archive (reversible with Unarchive)
- Delete - Permanently remove the entry (soft delete)
Only form owners and admins can archive or delete entries. Regular users can only manage their own entries.
Bulk actions
Section titled “Bulk actions”Select multiple entries using the checkboxes, then use the Bulk actions menu to archive or delete them in batch.
Reassigning entries
Section titled “Reassigning entries”Pending entries can be reassigned to a different user. This is useful when the original recipient is unavailable or the entry needs to be completed by someone else. Reassignment updates the entry’s owner and optionally adds a note explaining the change.
Exporting entries
Section titled “Exporting entries”Click Export to download all completed entries as a ZIP file containing one CSV per form. Each CSV includes all field values from that form’s submissions. This is useful for reporting, auditing, or importing data into other systems.
Related
Section titled “Related”Chat with us
We typically reply within a few minutes