1
Open the Contact Book
Click Contact Book in the left sidebar to open the directory of every company and person your organization has on file.
The same counterparty turns up on contract after contract. If their details live only on each contract, you re-type the company name, registration number, and signer every time, and a typo on one of them quietly splits your reporting. The Contact Book keeps one record per company and per person, so you enter the details once and reuse them everywhere.
This article covers adding and maintaining those records: when to create a company versus a person, the fields each one holds, linking a person to their company, and the tags and toggles that keep the book clean.
Every entry in the Contact Book is a party: either an individual party (a person) or a legal entity (a company). It is the same kind of record, with one switch that decides which fields it carries. There is no separate “company” object, a company is a party marked as an entity.
Which type you pick changes the fields you fill in:
| Legal entity (company) | Individual party (person) |
|---|---|
| Entity name | Name (first and last) |
| Entity type (for example Pte Ltd) | |
| Entity registration number | Title |
| Address, Country | Address, Country |
You choose the type when you create the contact. The type also controls which roles the contact can take on a contract and which custom attributes apply to it, so set it correctly up front.
You add contacts from the Contact Book directly, so the details are ready to reuse before you reach for them on a contract.
Click Contact Book in the left sidebar to open the directory of every company and person your organization has on file.
Click Add contact at the top of the list. The create dialog opens.
Pick the type at the top of the dialog. Legal entity shows the company fields (Entity name, Entity type, Entity registration number); Individual party shows the person fields (Name, Email, Title).
Complete the built-in fields, plus any custom attributes your organization has configured. Add the address and country, which both types share.
The contact is added to the Contact Book and is now available to attach to any contract.
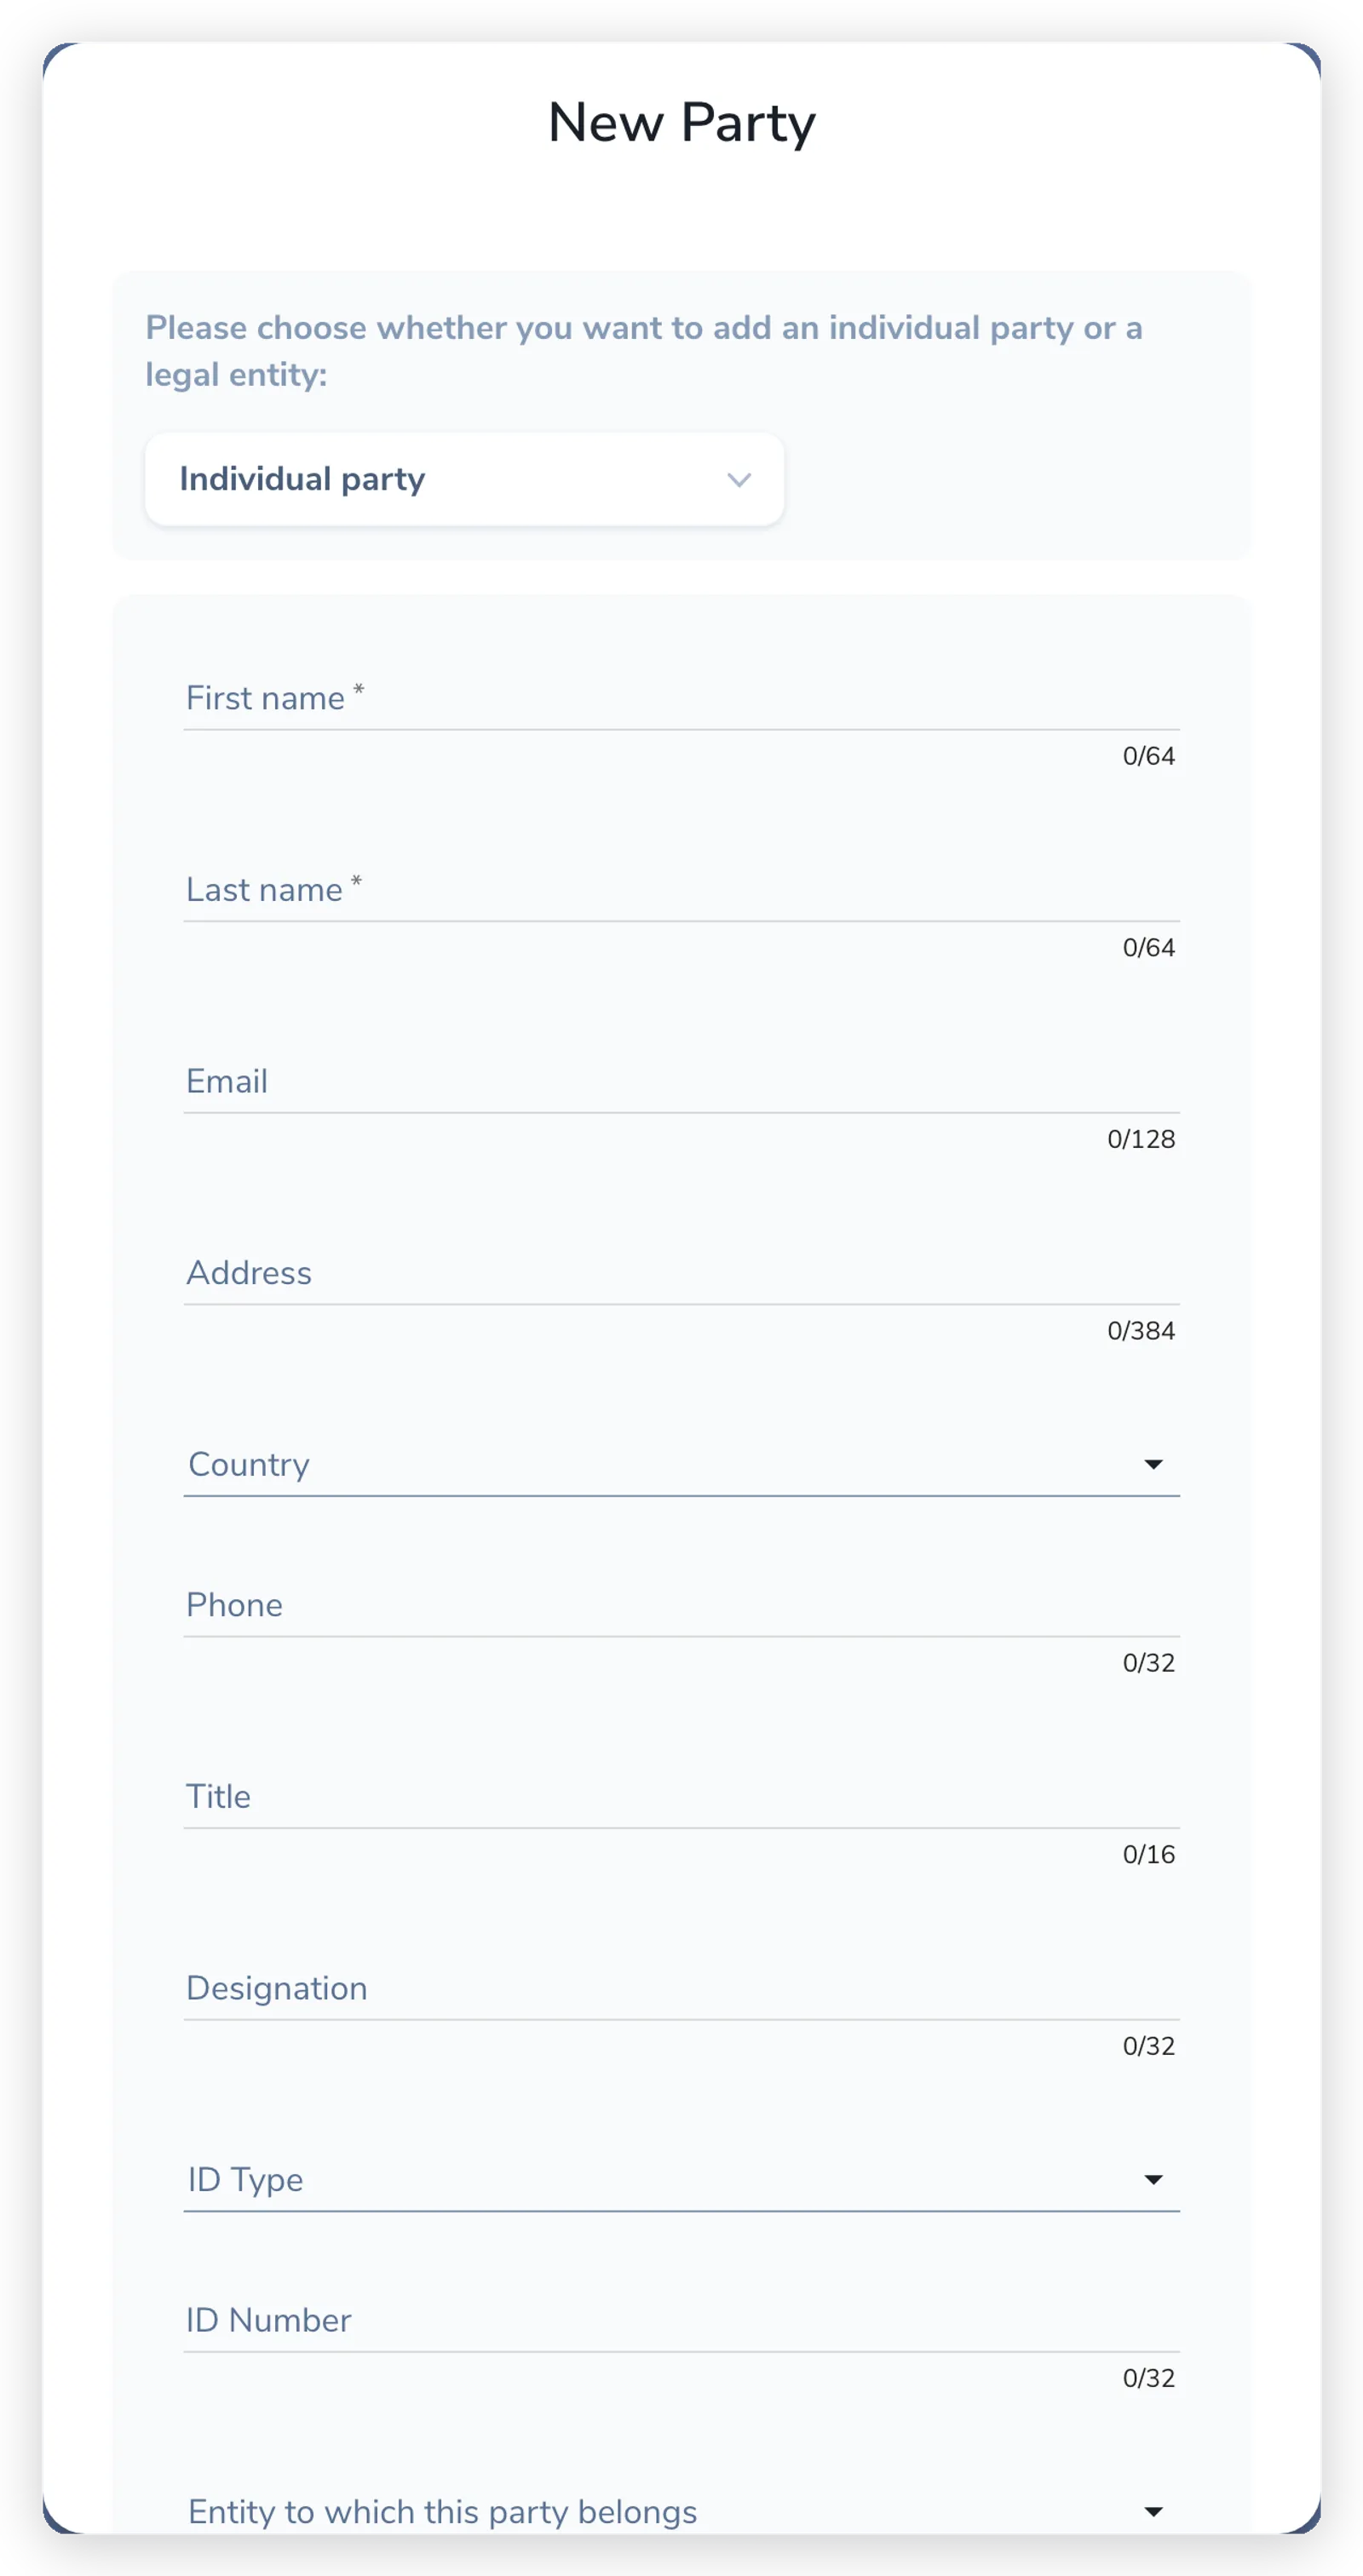
A signer usually belongs to a company: “Jane Doe at Acme”. You capture that relationship by setting a person’s Entity to a legal entity already in the Contact Book. On the create dialog this field is labelled “Entity to which this party belongs”; in the side panel it appears as Entity.
Open the person’s record, find the Entity field, and pick the company. The person now shows as affiliated with that entity, which keeps “who signs for whom” clear when the same company sends different signers across deals.
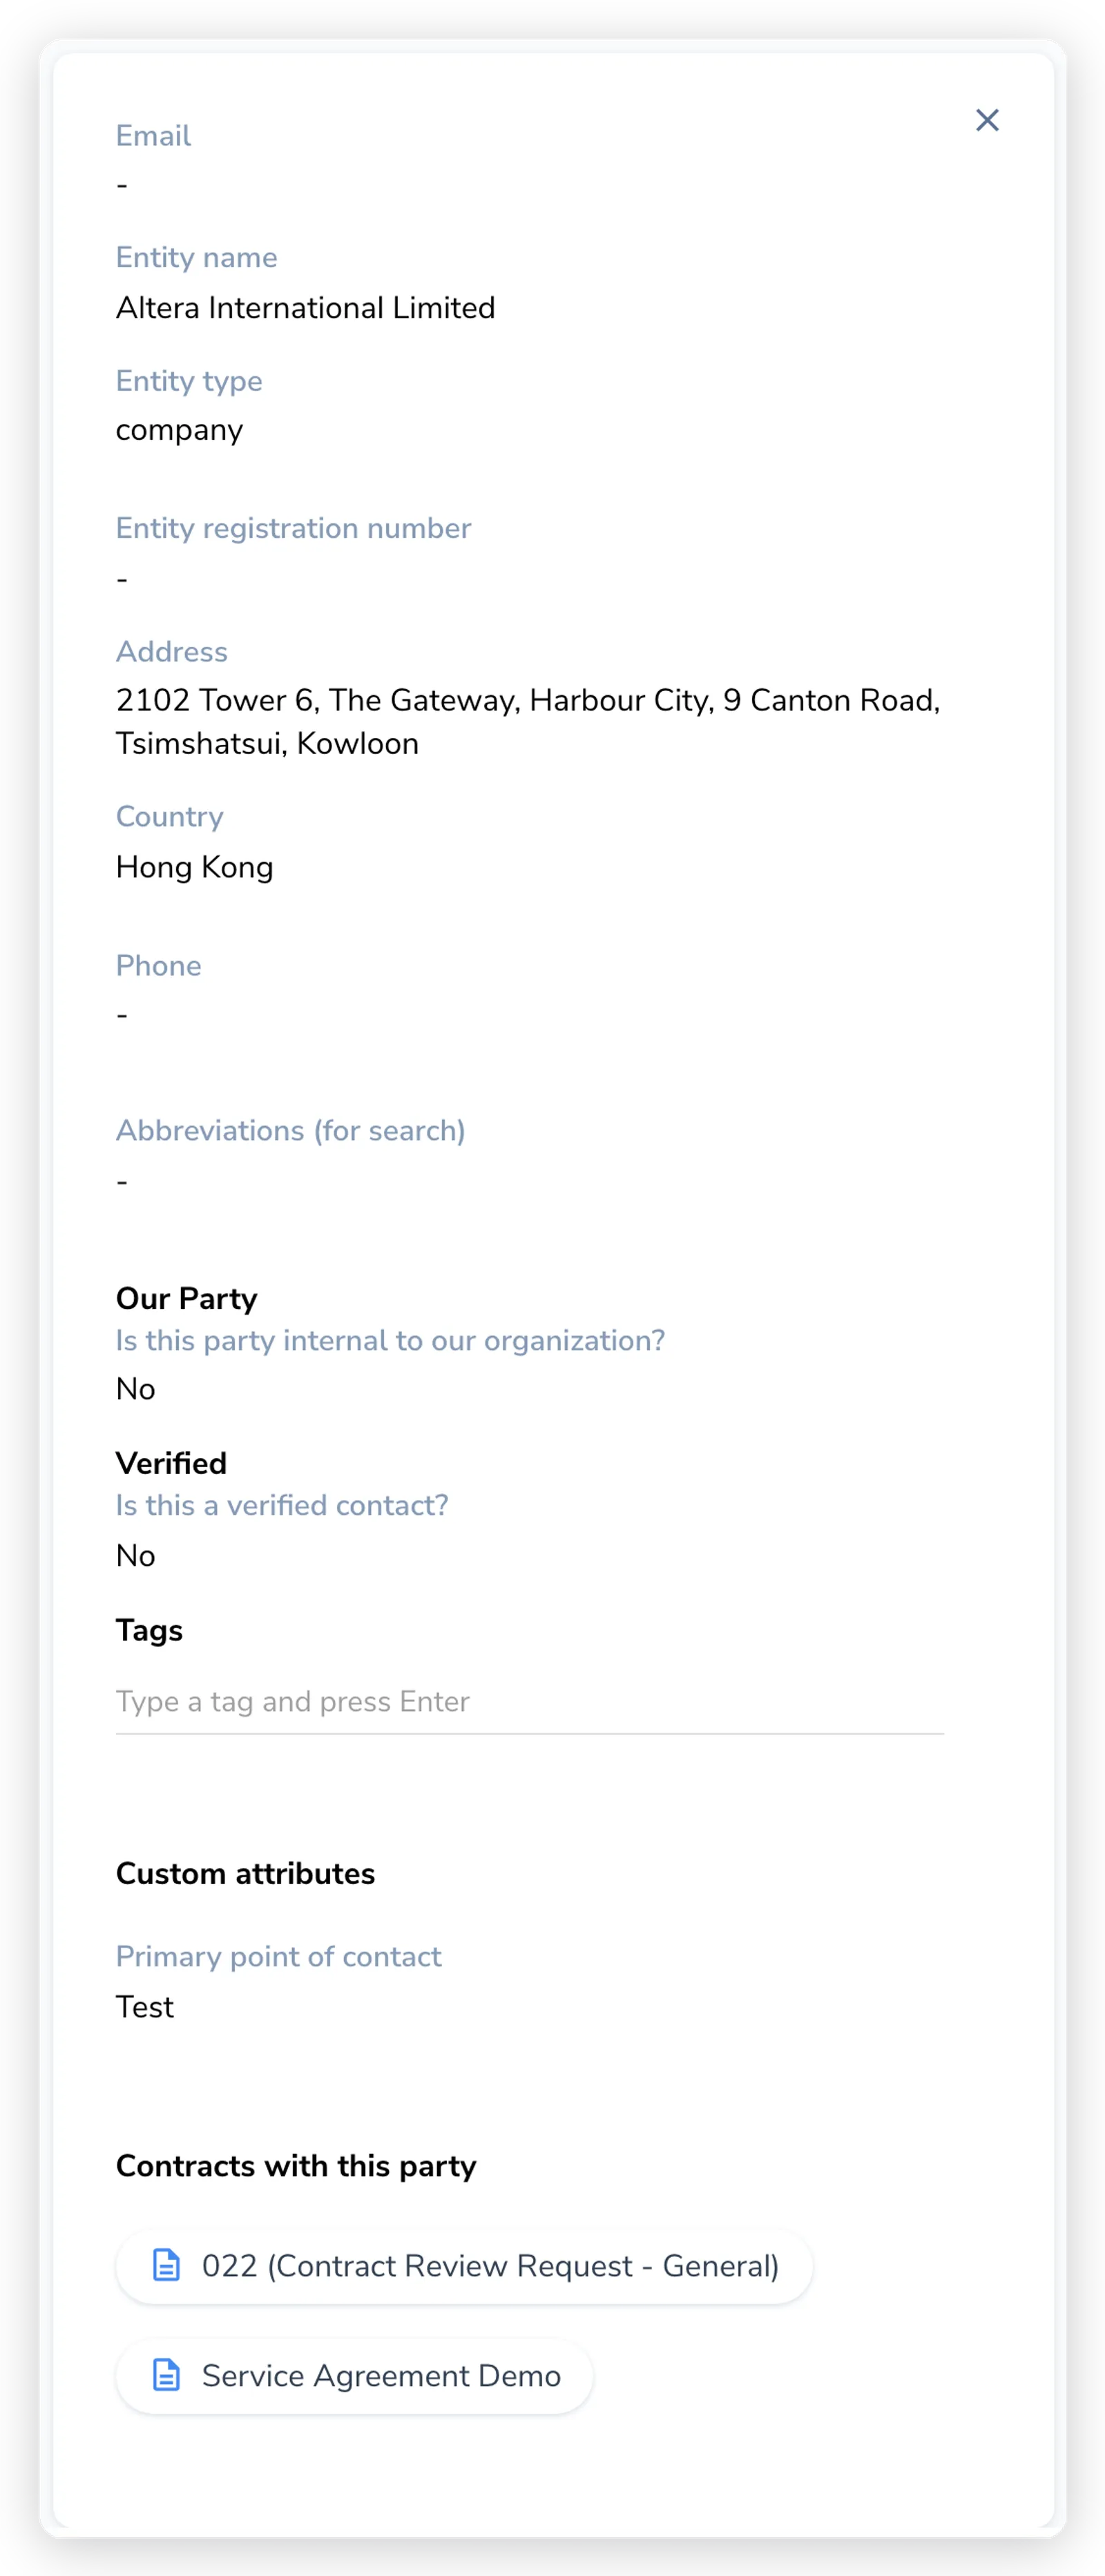
Click any row to open its side panel. The panel shows the contact’s fields for its type and lets you edit them in place, no separate edit screen. Changes save against the one shared record, so they appear on every contract that uses this contact.
The side panel is also where you set the housekeeping that keeps the book usable:
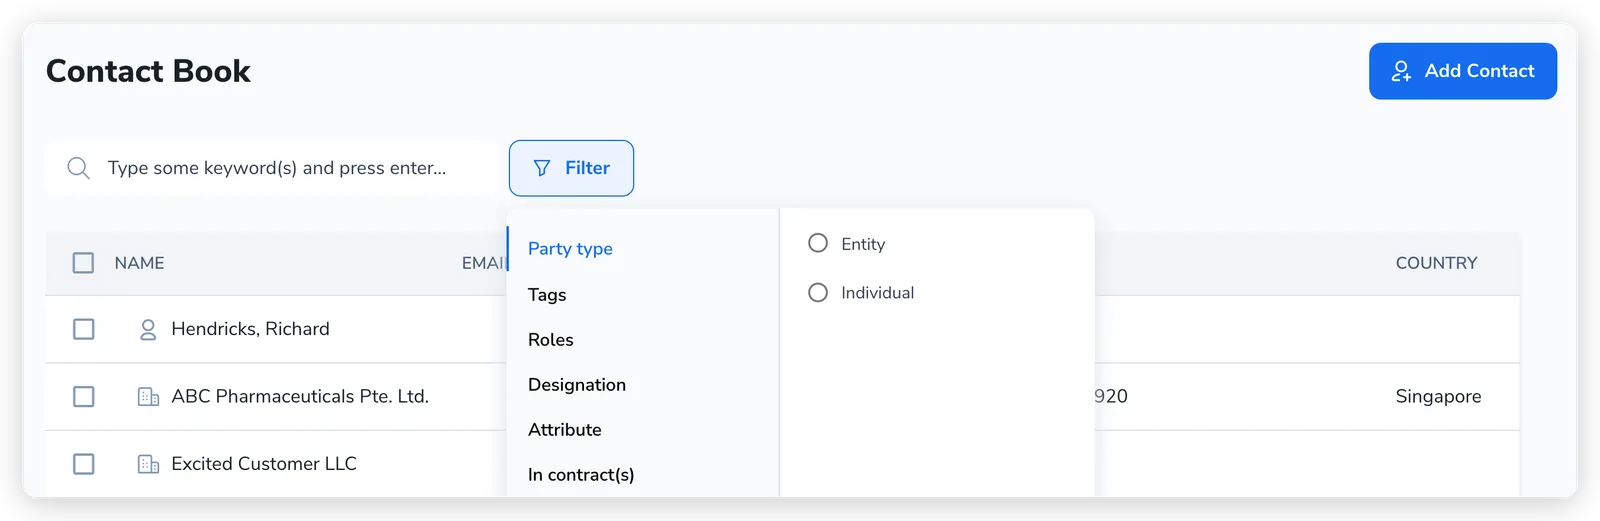
Once contacts are tagged and marked, use Filter at the top of the directory to narrow the list. You can filter by Party type (Entity or Individual), Tags, Roles, Designation, a custom Attribute, or In contract(s), which is how you work through a specific slice of the book.
Deleting a contact that is selected in contract properties clears those values. Before you confirm, Pactly checks whether the contact is used and shows how many contracts are affected.
For one contact, choose Merge into another contact to keep the contract properties filled in, or Delete anyway to clear them. Search for the contact to keep, then review and confirm the merge.
For several contacts, select their checkboxes and click Delete selected. The warning lists each contact used in contract properties and its contract count. Delete all N contacts deletes the whole remaining selection, including contacts that are not used in properties.
Choose Review and merge to review used contacts individually. Search the Contact Book for the contact to keep, select Review merge, and confirm Merge contacts. Next contact lets you review another contact without merging the current one. After each merge, the summary shows the remaining selection. The contact you kept is removed from that selection, and nothing else is deleted automatically. Select Done to finish without deleting the remaining contacts.
If none of the selected contacts are used in contract properties, Pactly shows the usual deletion confirmation. See Finding and merging duplicates for more about merging.
The reason to maintain contacts in one place is reuse. Once a company or person is in the Contact Book, you select it on any contract instead of re-entering its details, and the same record can sit on as many contracts as you need.
Each company or individual contact’s side panel includes a Contracts with this contact list. It shows up to 25 linked Contracts you can access, newest first by creation date, and excludes deleted Contracts. Click a Contract to open its record.
When the contact has accessible linked Contracts, select View all Contracts to open the full Contracts list with that contact selected as a filter. The filter displays the contact’s name, and the list keeps your preferred page size.
For the field types you can add beyond the built-in ones, and how they apply to individuals versus entities, see Party attributes.