1
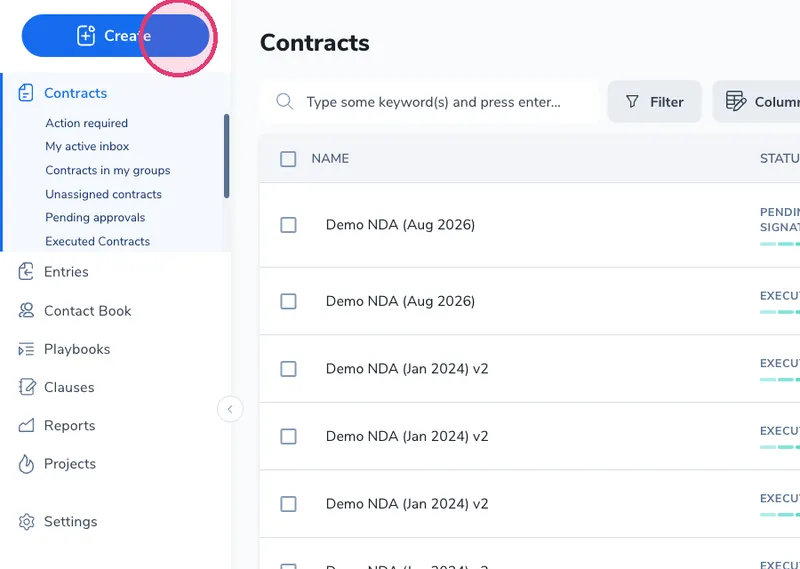
Click Create on the contract listing
Log into Pactly and click the Create button on the main contract listing screen.
This guide walks you through creating and sending a signature request in Pactly. By the end, you’ll be able to upload your documents and request electronic signatures.
Log into Pactly and click the Create button on the main contract listing screen.
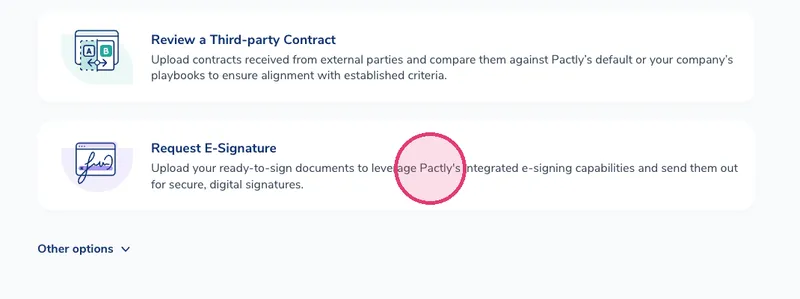
Select the Request E-Signature option. This allows you to upload your ready-to-sign documents and use any of our e-signature integrations or Pactly e-Sign to get your document signed.
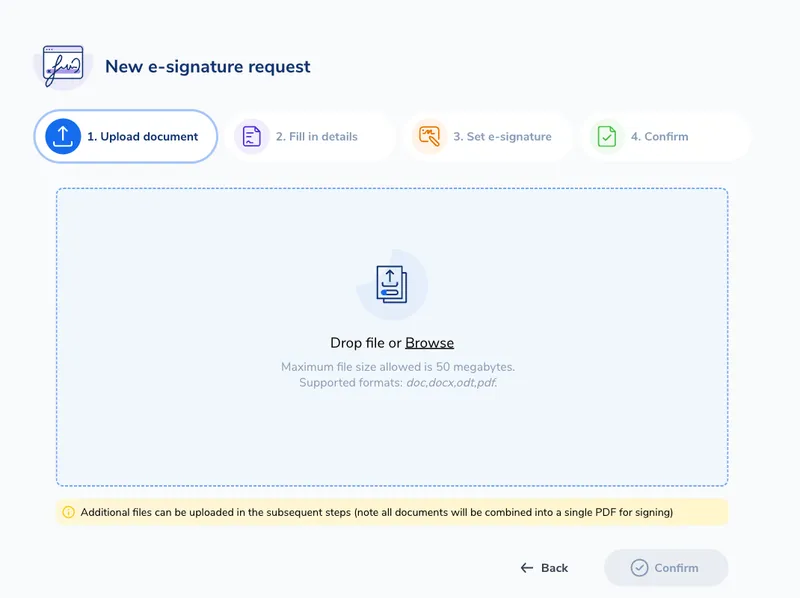
Upload your document. Accepted formats include .pdf, .docx, and .odt (Open Office document file). Save a legacy .doc file as .docx first.
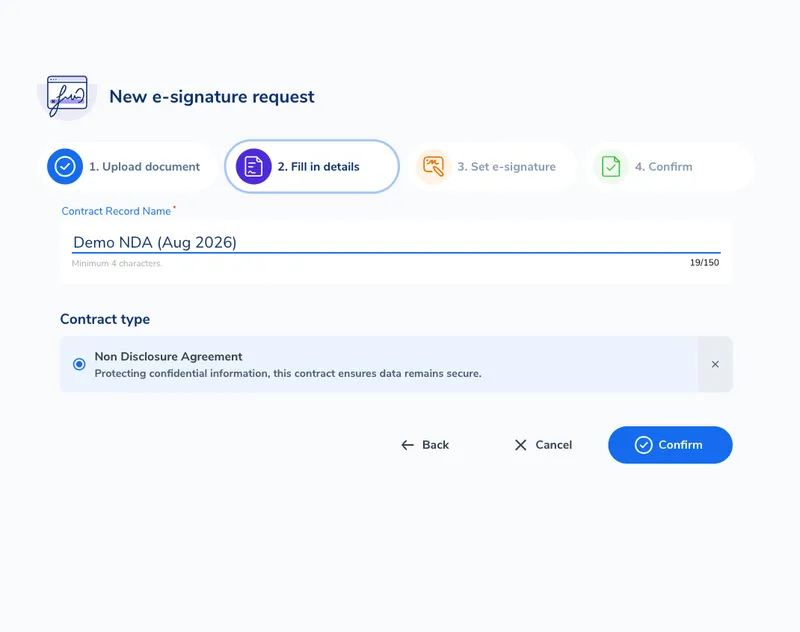
Rename your document (if you wish), select the relevant contract category, and click Confirm.
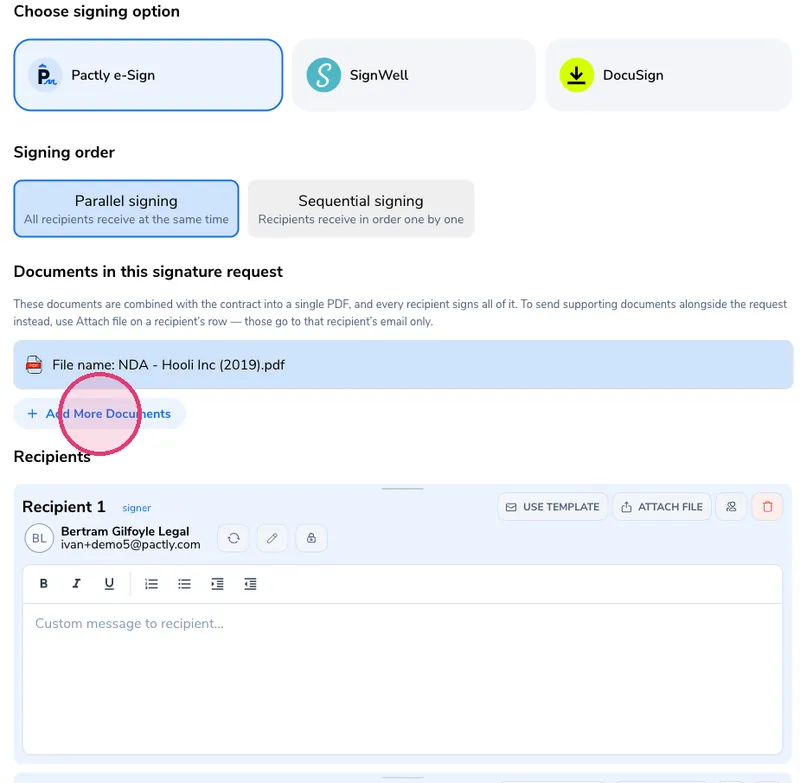
Choose your e-signature provider. If you have more than one set up, you'll see those options here. Otherwise, your default option will be selected.
Decide whether signers will sign in parallel (all signers can sign at any time; the document is complete only when everyone has signed) or sequentially (the second signer only receives the signing request after the first signer has completed signing).
Add your signers.
Choose whether the document should be marked as fully signed (the contract shows as "Executed" once everyone has signed; select this when sending to all parties, or if you're the last person to sign) or partially signed (the document stays as "Pending signature" after signing; select this if you're the first person to sign and need to send to another party afterward).
Under "Documents in this signature request", add any exhibit, schedule, or annex that has to be signed with the contract. Everything listed here is combined with the contract into a single PDF that every recipient signs. Drag a file to change where it sits in the merged document, and tick "Also save these documents to the contract" to keep a copy on the contract record.
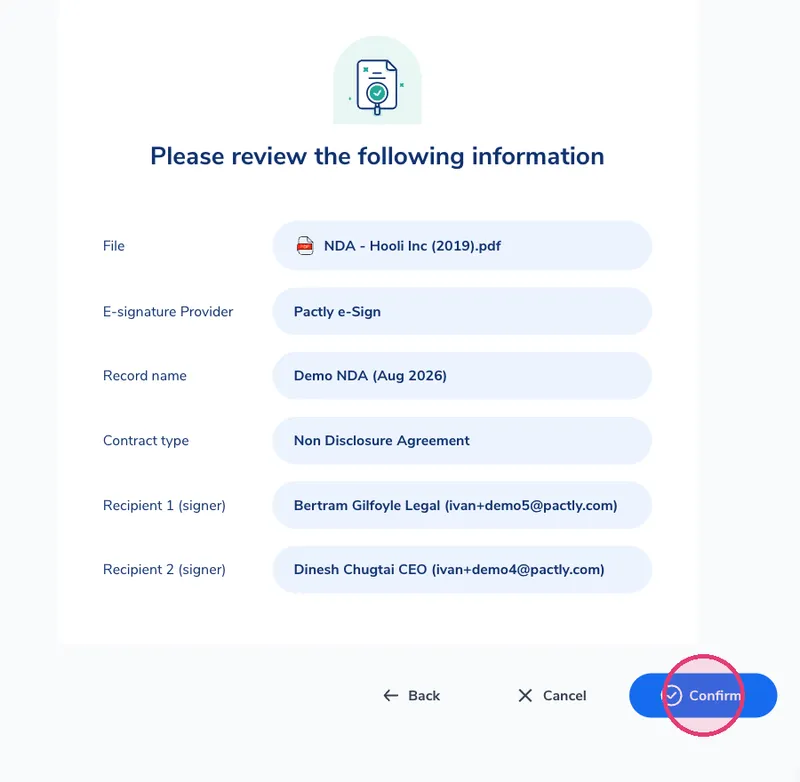
Review the information and click Confirm.
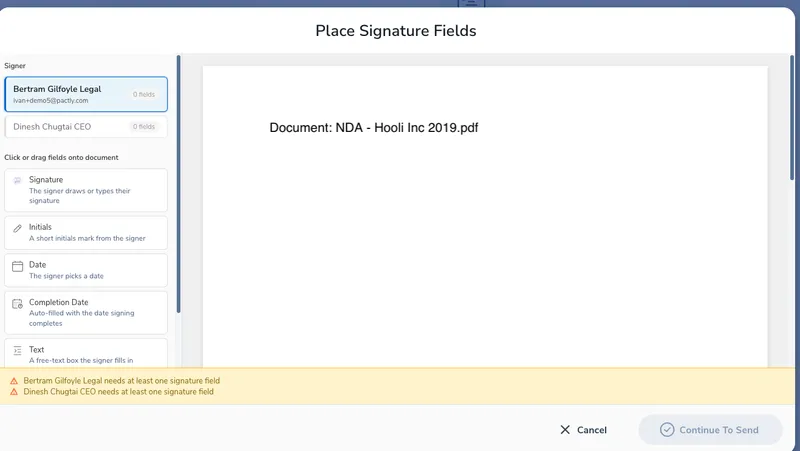
The Pactly e-Sign editor will open where you can add signature fields, text fields, date fields, or initial fields to the relevant parts of the document. Any documents you added come through as pages of the same file, so fields can go on those pages too.
Once you're done placing the fields, click Send Document. You can customize the email title and message (though if you have workflow presets, we recommend keeping the defaults). Click Send to complete. After sending, you'll be redirected to the contract record in Pactly.
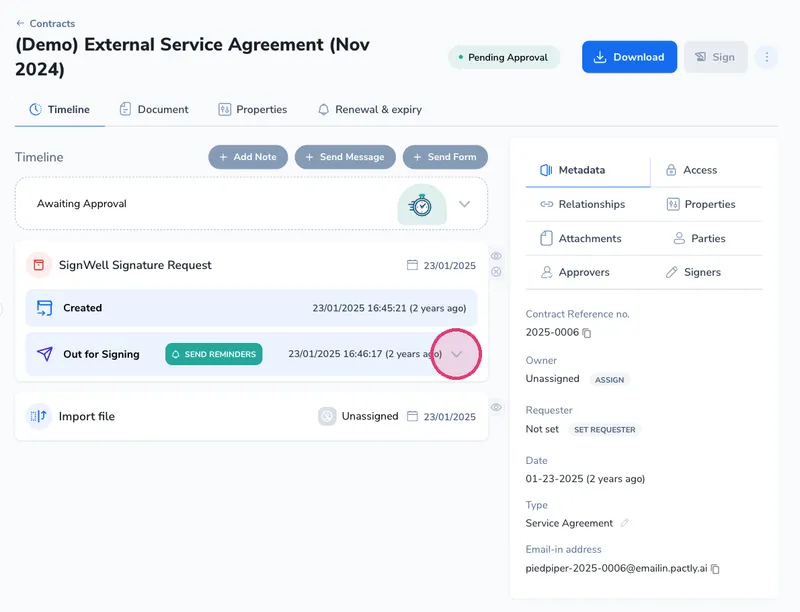
On the contract record, you'll see the e-signature request logged in the timeline. The status updates automatically as signatures are completed. Once all signatures are collected, the contract moves to "Executed" status.
If a signer needs to add a company stamp, choose Company stamp at the bottom of the field list and place it on the document. Leave room for the stamp and the signer’s Signature field. Every signer still needs a personal signature.
The signer can upload a stamp image or generate a circle, oval, or rectangle from company details. They choose the stamp when completing the request.
Name fills in the selected signer’s name when you place the field. You can edit that value before sending, and the signer can correct it before signing.
Date signed is filled automatically when its assigned recipient signs. Completion Date is filled when signing is complete. Select a date field to choose how its date is displayed.
Text shrinks to fit the space you give it. If it becomes too small, a warning appears beside the selected field. Enlarge the field to make the text easier to read; the warning disappears when it fits at a readable size.
The contract’s Signing presets save settings for the next signature request. Saving those settings does not send invitations; use Sign to prepare and send the request.
A signing link works for whoever holds it. To stop a forwarded link from being used, Pactly e-Sign can ask each signer and viewer to enter their Pactly password. Choose an option under Signer identity:
The login options are available only when every signer and viewer has a Pactly account that signs in with a password. Until then they are disabled, and a note lists the recipients who are not eligible. While a login option is selected, Pactly will not add a recipient without an account. Accounts that sign in only through single sign-on (SSO) cannot use these options yet.
Each verified login is recorded in the audit trail and on the audit certificate, with the account and how the recipient confirmed it was them.
If you close the signing dialog or reload the page, Pactly e-Sign can recover your signing setup and placed fields in the same browser for up to 24 hours. Recovery belongs to the account you used to prepare the request. It does not follow you to another browser or device, and opening it never sends invitations.
In the field editor, Back to signing settings lets you edit signer details while keeping your fields. Access codes are not saved; enter them again when asked. If the document, recipients or signing eligibility has changed, or the saved preview has expired, Pactly explains why it cannot restore the old setup.
If the browser cannot save recovery, keep the page open until you finish. The warning means closing or reloading may lose the current preparation.
Two different things can travel with a signature request, and it is worth knowing which one you want.
Documents in this signature request become part of what is signed. They are merged with the contract into one PDF, so the signing page renders them, the executed PDF contains them, and the audit report covers them. Use it for exhibits, schedules, and annexes that form part of the agreement.
Attach file, on an individual recipient’s row, emails a supporting document to that recipient only. It is not merged, not signed, and does not appear in the executed PDF. Use it for background material one party needs in order to sign, such as a reference copy of a policy.
Two things to know before you build the request:
If someone else needs to sign an active Pactly e-Sign request, open the contract’s Timeline and find the Out for Signing entry. Click Replace signer beside the person to replace. This action requires permission to manage the contract’s signers and is unavailable once that person has signed or the request has ended.
Choose a contact or click Enter details, save the new signer’s name and email, and enter a reason. If the dialog shows a personal message, agreement summary or attachments, choose what to share with the new signer. If an access code is required, enter a new code and share it separately. Then click Replace signer.
The removed signer receives an email telling them they no longer need to sign, and their old signing links stop working. The new signer receives an invitation immediately, or when their turn arrives in a sequential request. Their position, the document and other people’s completed signatures are preserved. To change names or other details already written in the document, cancel the request and send an updated document instead.
The timeline records the replacement and shows progress while notifications are being sent. If an email cannot be confirmed, check with the recipient before retrying, since it may still arrive. Use Retry delivery for a replacement notification or Send reminders for an original invitation. The replacement remains saved even if its notification is unconfirmed.