1
Open Playbooks and choose Create from scratch
From the left menu, open Playbooks, click Add Playbook, then choose Create from scratch.
This guide builds a playbook from scratch, one position at a time, then publishes it so your team can run reviews against it.
If you would rather not start from a blank page, Pactly offers three faster starting points. All four methods land in the same editor, so the position steps below apply whichever way you start:
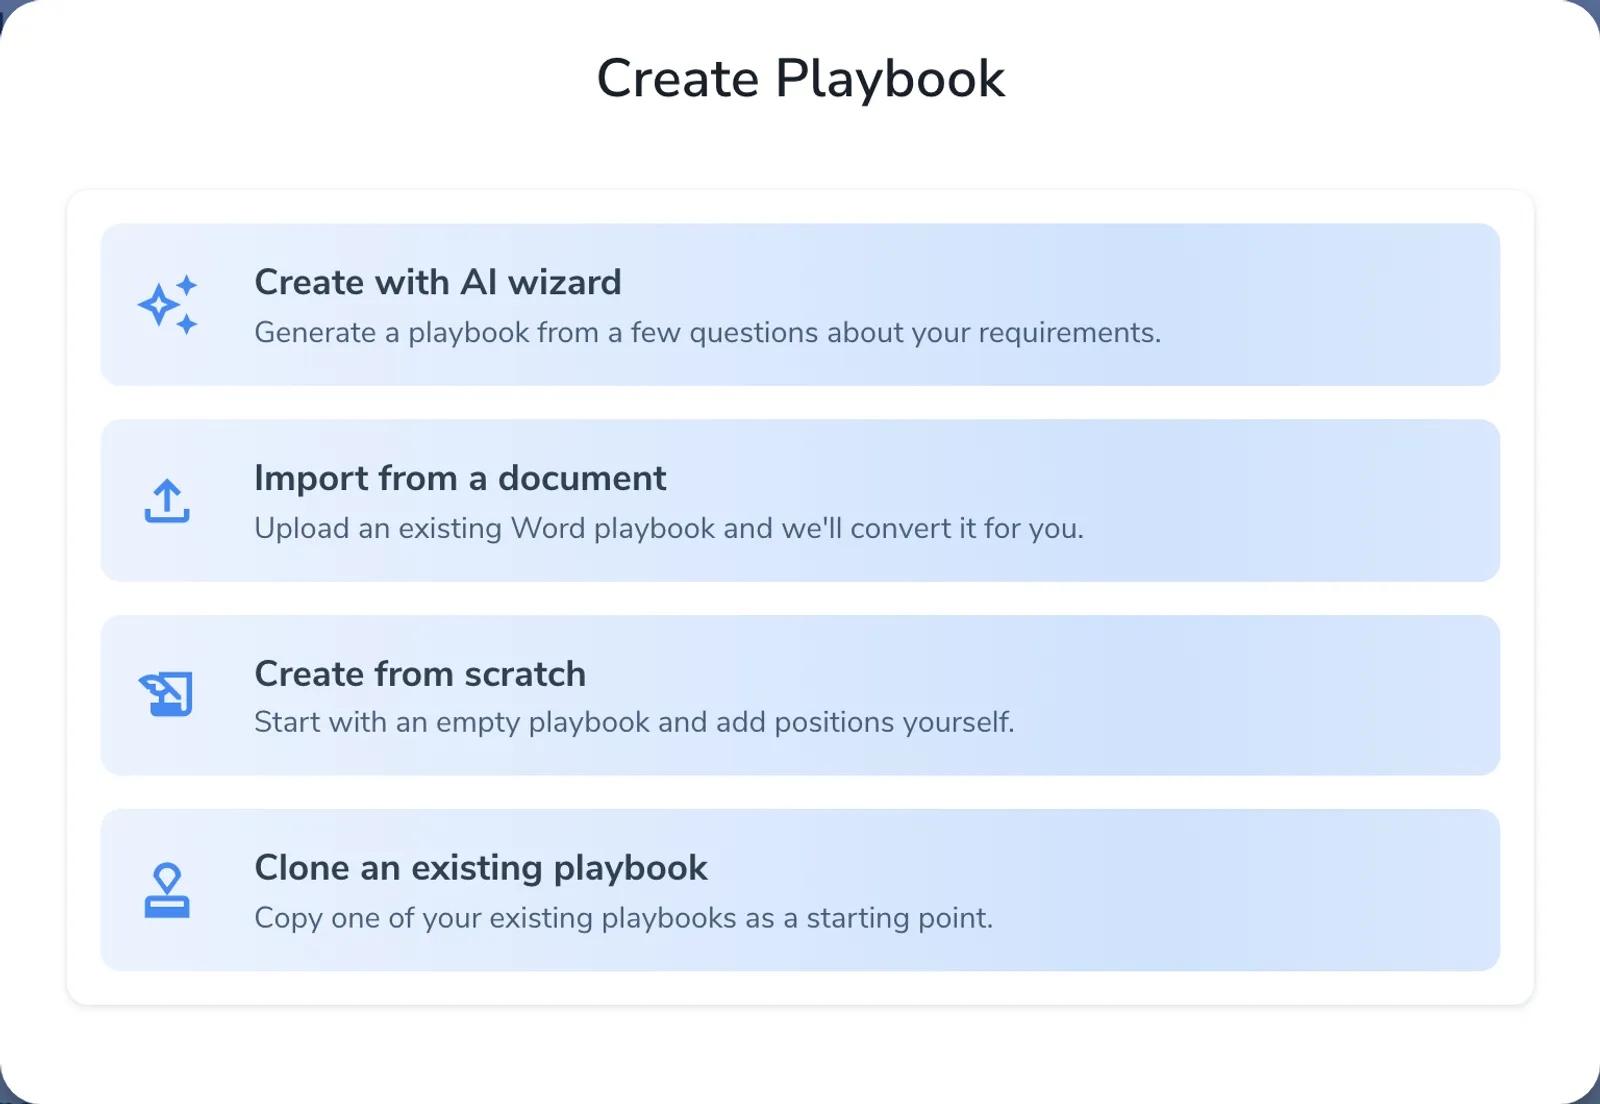
You can generate one with AI, import an existing Word playbook, or clone one of your own. Your Pactly contact can also build a playbook from your standards and hand it over for you to maintain.
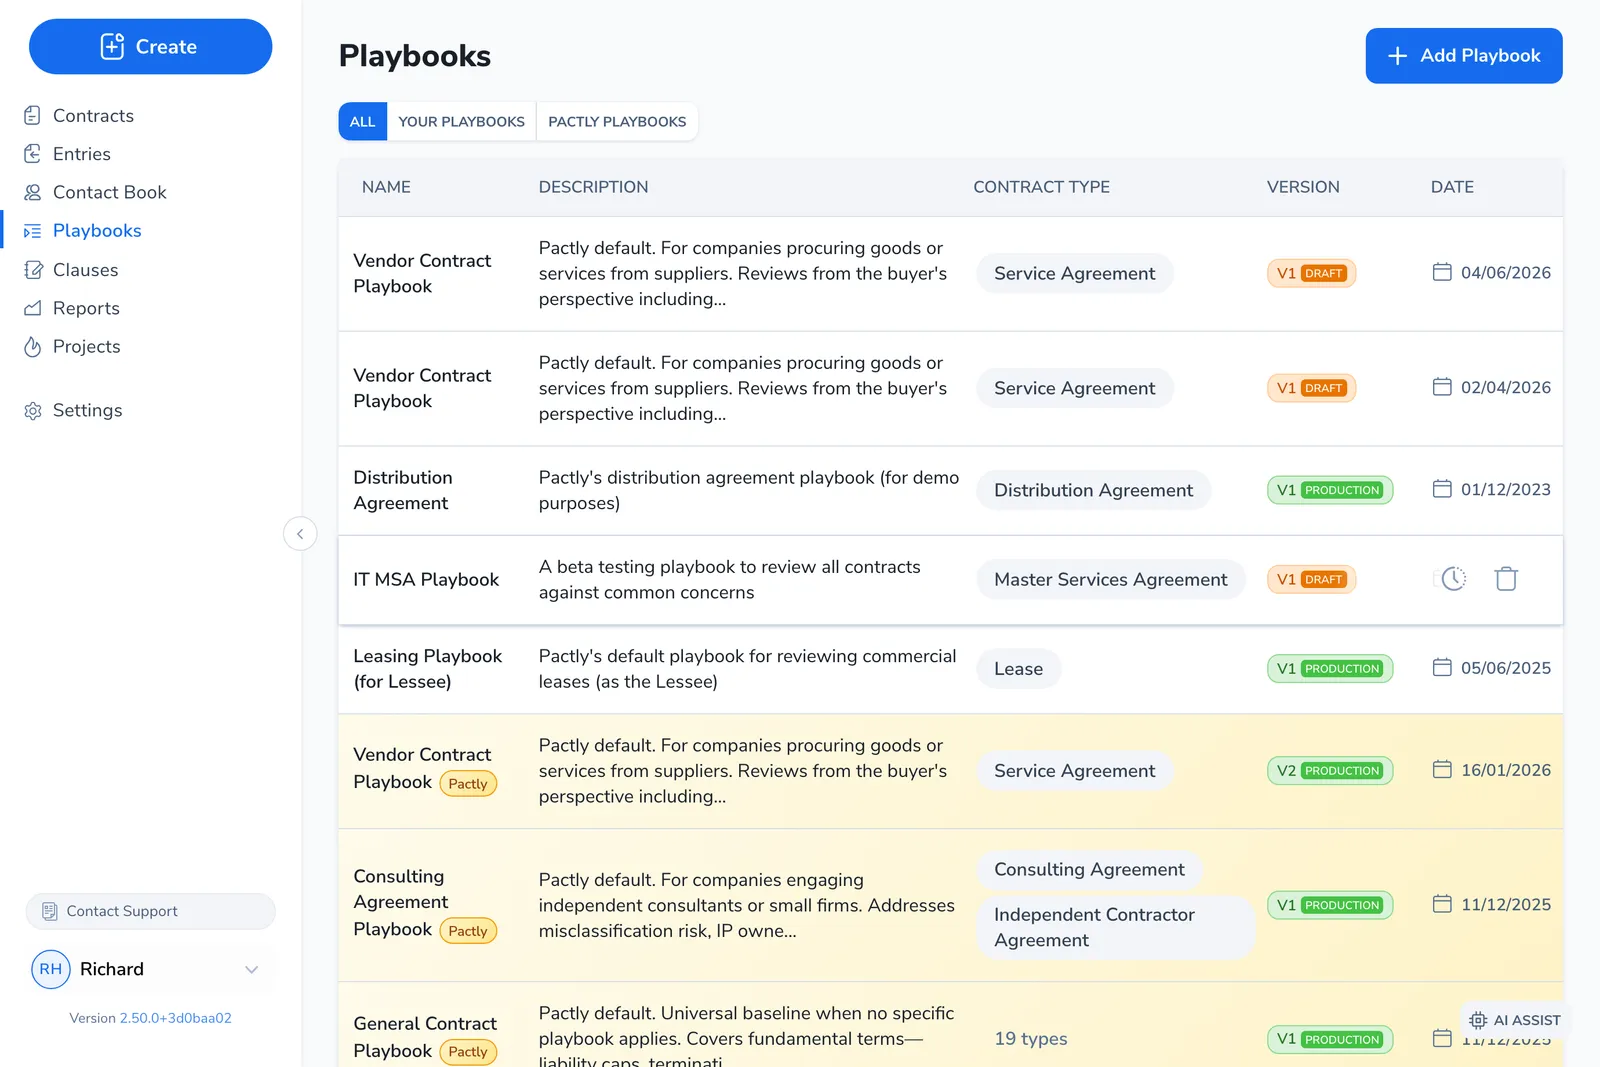
To create and edit company playbooks you need the playbook permission on your role. That permission is what shows the Playbooks item in the left menu. Pactly’s own default playbooks (marked Pactly Playbook) can only be edited by master admins; everyone else can copy one into their company to customize it.
It helps to have on hand your organization’s negotiation standards (formal or informal), a few sample clauses you consider acceptable, and a short list of the topics that most often cause problems in review. No written standards is common: you can still build a playbook by interviewing experienced colleagues about what they check for.
A playbook is a set of positions, each one topic the AI checks (such as Limitation of Liability or Governing Law). Only a position’s name and description are required, so start with a handful of your highest-risk topics and add the rest later.
From the left menu, open Playbooks, click Add Playbook, then choose Create from scratch.
Enter a Name that says when to use it (such as "Vendor Agreement Review"), a Description, and the Contract type(s) it applies to. Click Create. The contract type drives which playbooks are offered when reviewing a contract of that type.
Click Add Position, enter a Name like "Limitation of Liability", and save. The position opens in the editor on the right.
Write the Description (the requirement the contract must or must not meet) and set the Classification when no evidence found. Optionally add notes, Suggested clauses, examples, a group, and keywords. See Writing Effective Positions for how to write each part well.
Add the rest of your positions, then click Publish and enter a version note. The playbook becomes available for reviews and its positions lock until you create a new version.
The description is the part that makes a position work, so write each one as a checkable standard rather than a vague instruction, and set the no-evidence classification to match. Both are covered in depth, with examples, in Writing Effective Positions and the field-by-field Position Reference.
While a playbook is a draft, only you can see and use it. Run it against a few real contracts of the type it covers and check that the AI finds the right clauses and reaches sensible verdicts, then adjust before publishing. To run a review, see Running a Playbook Review in Word or review it in the web app.
When you publish, the draft becomes the live version and its positions lock. To change a published playbook, click New Version, edit the new draft, test, and publish again. Version history is preserved, so document each change in the version note. Update a playbook when your standards change or when reviewers keep overriding the same verdict, which usually means the description does not match how you actually negotiate.
We typically reply within a few minutes