Entra ID App Setup for SSO (OIDC)
Turning on SSO in Pactly is one toggle. The part that needs care is on the Microsoft side: which Entra ID application Pactly authenticates through, and how that application is configured. Get this wrong and sign-ins fail with tenant or redirect errors; get it right once and you rarely touch it again.
Pactly signs users in with OpenID Connect (authorization code flow) against Microsoft Entra ID. This article covers the app registration choice and the Entra-side configuration. For the surrounding settings (enabling SSO, password fallback, provisioning), see Single Sign-On with Microsoft Entra ID.
Choose an app registration model
Section titled “Choose an app registration model”Your Tenant ID is entered on the main Microsoft Entra ID card in Account settings → Single Sign-On — it is required before SSO can be saved at all. The App Registration card below it decides which Entra application authenticates against that tenant. Both models end in the same sign-in experience; they differ in who owns the application.
| Pactly’s multi-tenant app | Custom Azure AD app | |
|---|---|---|
| Who manages the app | Pactly | Your organization |
| You supply | Nothing beyond the Tenant ID on the main card | Client ID and Client Secret (plus the Tenant ID on the main card) |
| Secret rotation | None (no secret to manage) | You rotate the secret before it expires |
| When to choose | Default, simplest | Your security policy requires a self-managed app |
Option A: Pactly’s multi-tenant app
Section titled “Option A: Pactly’s multi-tenant app”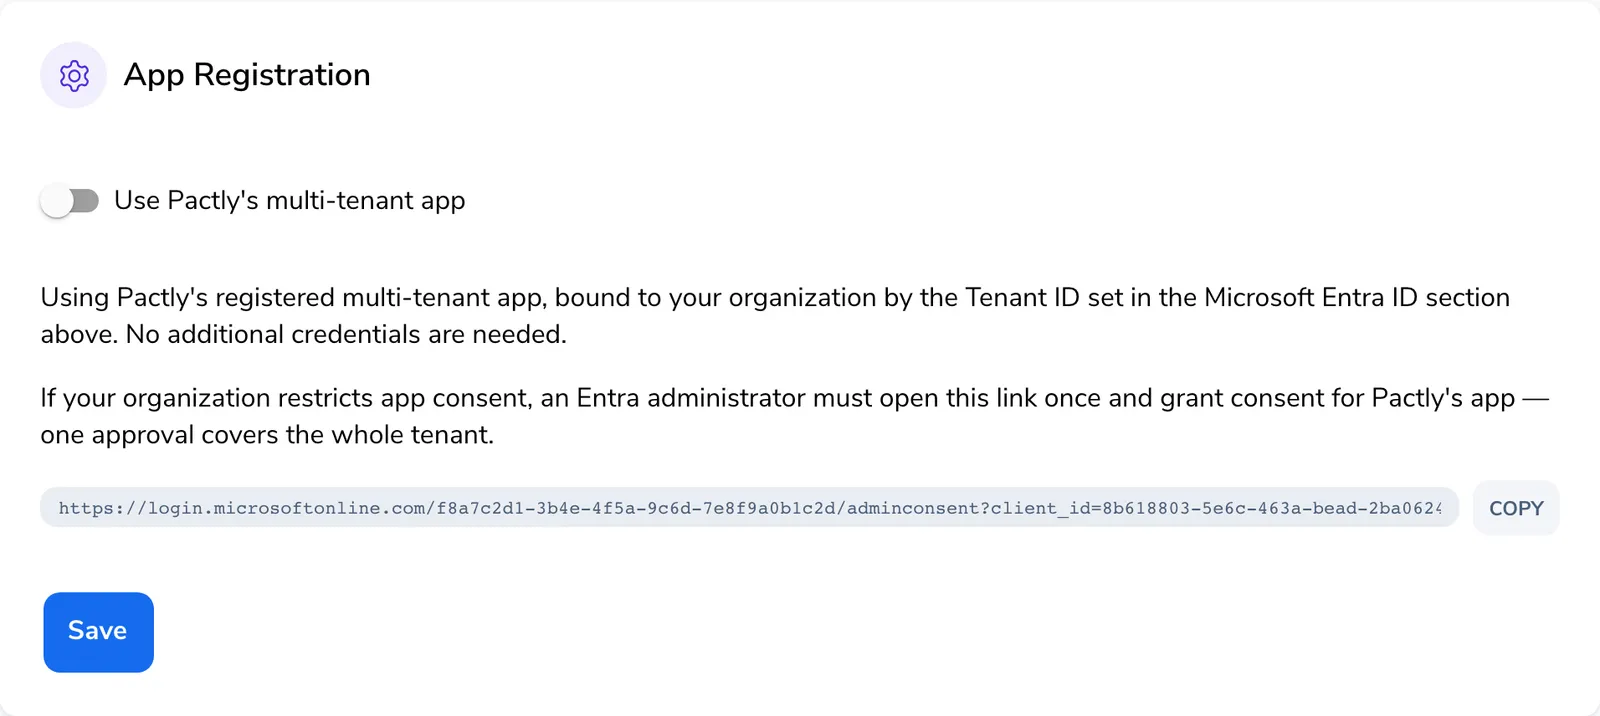
- Enter your Tenant ID on the main Microsoft Entra ID card: the Directory (tenant) ID shown on your Entra ID overview page in the Azure portal.
- Leave the App Registration toggle on Use Pactly’s multi-tenant app.
- Click Save.
If Pactly’s application has not yet been consented in your tenant, an Entra administrator must grant consent once. With your Tenant ID set, the App Registration card shows the admin consent link in a copyable field — click it to select the URL (or use Copy) and send it to the administrator to open and accept.
Option B: Your own app registration
Section titled “Option B: Your own app registration”Use this when your security policy requires an application your organization controls.
In the Azure portal
Section titled “In the Azure portal”- Go to App registrations and click New registration. A single-tenant registration is fine; Pactly pins sign-ins to your tenant either way.
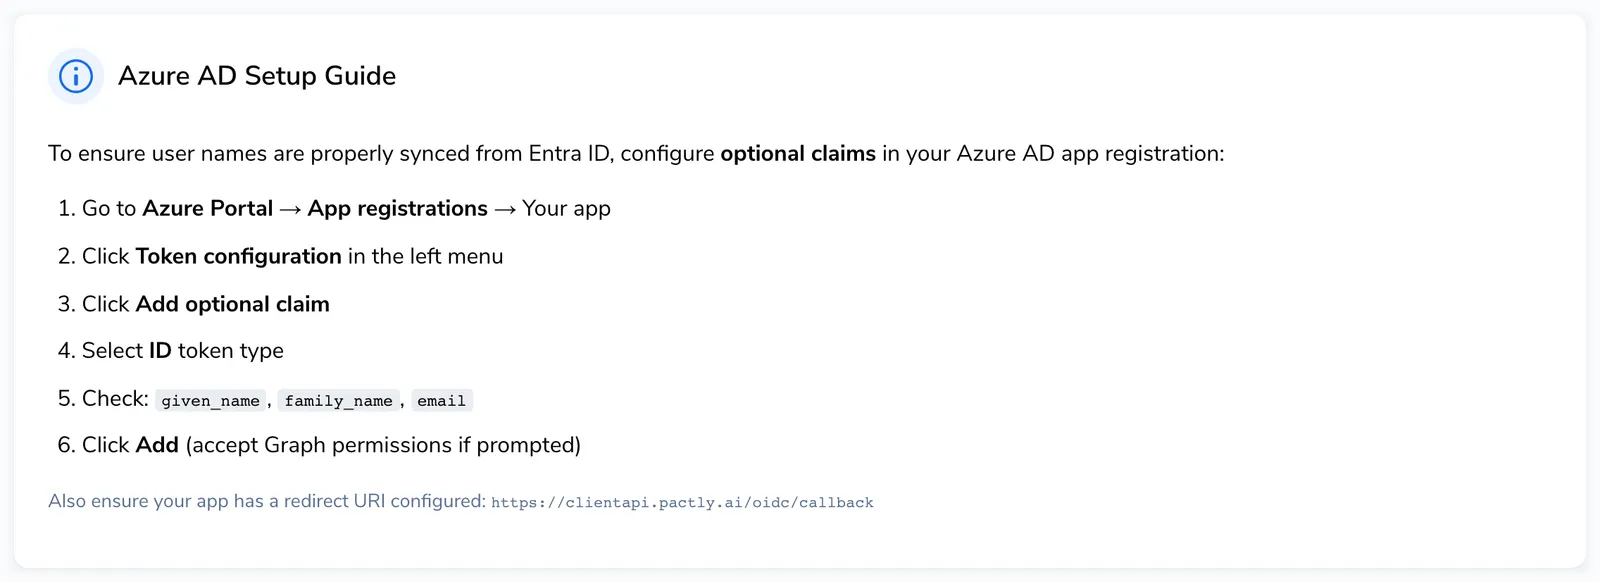
- Under Authentication, add a Web platform with the redirect URI shown in Pactly’s Azure AD Setup Guide card: your Pactly API host followed by
/oidc/callback. Copy the exact value from Pactly rather than typing it. - Under Certificates & secrets, create a client secret. Copy the secret value immediately (Azure shows it only once) and note its expiry date.
- Under Token configuration, add the optional claims
given_name,family_name, andemailto the ID token, and accept the Graph permissions prompt. Without these, Pactly cannot read users’ names and falls back to naming accounts from the email address.
In Pactly
Section titled “In Pactly”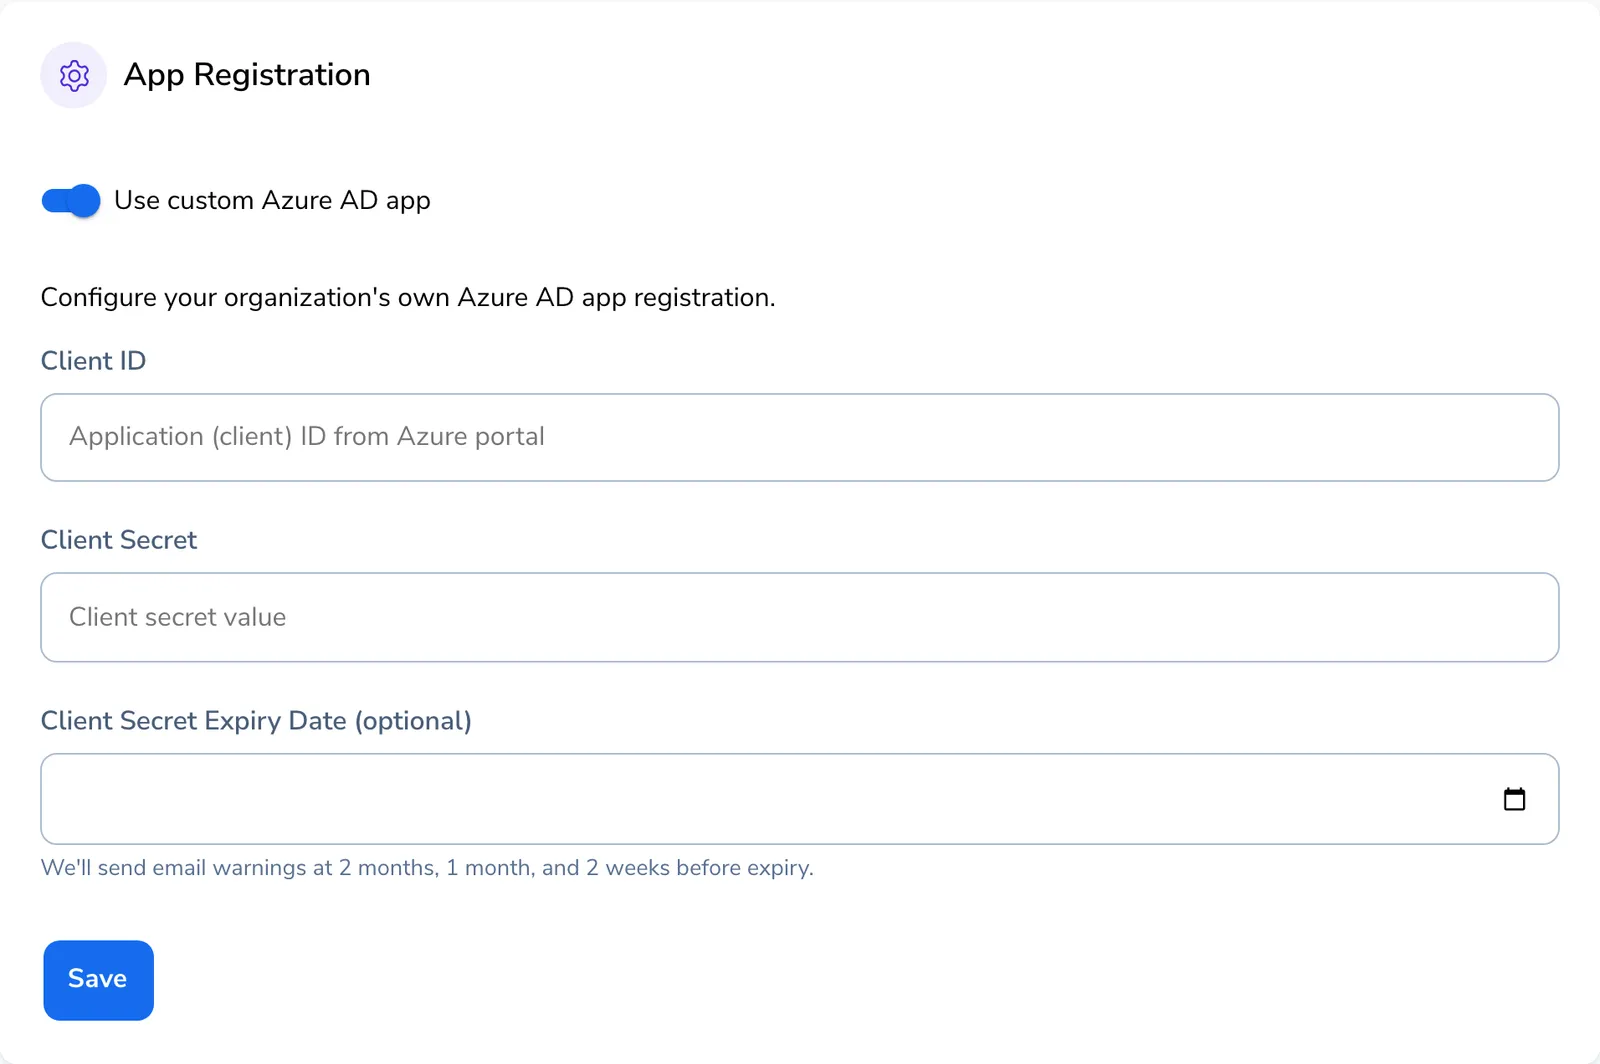
- Switch the toggle to Use custom Azure AD app. Your Tenant ID is already set on the main card; the custom app must be registered in that same tenant.
- Enter the Client ID (Application ID) from your app registration’s overview page.
- Enter the Client Secret value you copied from Azure. The secret is stored encrypted and never shown again; enter a new value only when rotating it.
- Enter the Client Secret Expiry Date so the upcoming expiry is flagged ahead of time (see below).
- Click Save.
What Pactly requests and reads
Section titled “What Pactly requests and reads”Pactly requests the scopes openid profile email and reads these ID token claims:
| Claim | Used for |
|---|---|
email or preferred_username | Matching the user’s Pactly account by email address |
oid | The stable link between the Entra user and the Pactly account |
tid | Verified against your configured Tenant ID on every sign-in |
given_name, family_name | The user’s first and last name |
Directory attributes (jobTitle, department, companyName, officeLocation, and similar) | Shown read-only as Organization info on the user’s profile and in User management, marked “Managed by SSO” — informational only, no effect on roles or permissions |
The tenant check means a token issued by any other Entra tenant is rejected, even if the email address matches, so a look-alike account in a different tenant cannot sign in to your Pactly company.
Client secret expiry
Section titled “Client secret expiry”Azure client secrets expire on the date set in the Azure portal, and SSO stops working the moment the secret lapses. On domains where password fallback is disabled, that locks users out until a new secret is entered.
- Record the Client Secret Expiry Date in Pactly so your account’s default admin is emailed at 2 months, 1 month, and 2 weeks before expiry.
- Rotate ahead of time: create the new secret in Azure, then paste the new value into the Client Secret field in Pactly and save. There is no downtime when you rotate before expiry.
First sign-in and provisioning
Section titled “First sign-in and provisioning”Once the app is wired up, how accounts come into existence is a separate choice. With Just-In-Time provisioning enabled, a new user’s account is created on their first successful SSO sign-in, with the configured default role. With SCIM provisioning, Entra ID creates and deactivates accounts ahead of and independent of sign-in. Both are configured in the same Single Sign-On settings; see SCIM user provisioning for the full lifecycle.
If your company has locked domains, SSO sign-ins (and JIT account creation) are limited to email addresses on those domains. See Verify and lock your domains.
Troubleshooting
Section titled “Troubleshooting”Failed sign-ins return the user to the Pactly login page with an error. The common ones:
- “This Entra tenant is not authorized for this organization.” The signing tenant does not match the Tenant ID configured in Pactly. Check the Tenant ID against your Entra overview page.
- “SSO tenant ID must be configured before new SSO users can sign in.” The Tenant ID is empty — possible only on configurations saved before it became required. Set it on the main Microsoft Entra ID card and save.
- “Your email domain (…) is not authorized for SSO with this organization.” The user’s email domain is not among your locked domains.
- “Your account does not exist. Please contact your administrator to create your account.” The user has no Pactly account and Just-In-Time provisioning is disabled. Enable JIT, provision the user over SCIM, or add them manually.
- Names appear as the email address followed by “(SSO)”. The optional claims are missing from your app registration. Add
given_name,family_name, andemailas ID token claims (Option B, Azure step 4). - SSO worked and suddenly stopped for everyone. The most common cause is an expired client secret. Create a new secret in Azure and enter it in Pactly.